Node.js quick start
Learn how to build an application with Node.js that connects to the Memgraph database and executes simple queries.
Running queries directly from a web browser is not recommended because of additional requirements and possible performance issues. In other words, we encourage you to use server-side libraries and clients for top performance whenever possible.
Quickstart
With this Node.js quickstart guide learn the first steps of connecting to Memgraph and executing simple queries.
These instructions will guide you through your first steps of connecting to a running Memgraph database instance and visualizing your data using Node.js and JavaScript.
Run Memgraph
If you’re new to Memgraph or you’re in a developing stage, we recommend using the Memgraph Platform. Besides the database, it also includes all the tools you might need to analyze your data, such as command-line interface mgconsole, web interface Memgraph Lab and a complete set of algorithms within a MAGE library.
Ensure Docker is running in the background. Depending on your operating system, execute the appropriate command in the console:
For Linux and macOS:
curl https://install.memgraph.com | shFor Windows:
iwr https://windows.memgraph.com | iexThe command above will start Memgraph Platform, which includes Memgraph database, Memgraph Lab and Memgraph MAGE. Memgraph uses Bolt protocol to communicate with the client using the exposed 7687 port. Memgraph Lab is a web application you can use to visualize the data. It’s accessible at http://localhost:3000 if Memgraph Platform is running correctly. The 7444 port enables Memgraph Lab to access and preview the logs, which is why both of these ports need to be exposed.
For more information visit the getting started guide on how to run Memgraph with Docker.
Install Node.js
Install the newest version of Node.js. You can find instructions on how to download and install Node.js suitable for your environment on the official Node.js website.
Install JavaScript Driver
To create the following Node.js application, you first need to install the JavaScript Driver.
Run the following npm command to install the Neo4j JavaScript Driver:
npm i neo4j-driverThe Driver requires npm and any LTS version of Node.js.
Set up your script
We’ll be using Express.js to demonstrate how to connect to a running Memgraph instance. Express.js is a web application framework that enables us to create complete Node.js applications.
Let’s jump in and connect a simple program to Memgraph.
Create a new directory for your application and position yourself in it:
mkdir MyApp
cd MyApp
Initialize your project and create a package.json file with the command:
npm initInstall Express.js and the Bolt driver in the /MyApp directory while
adding them to the dependencies list:
npm install express --save
npm install neo4j-driver --save
To make the actual program, create an example.js file and add the following
code:
  const express = require("express");
  const app = express();
  const port = 3000;
  var db = require("neo4j-driver");
  app.get("/", async (req, res) => {
    const driver = db.driver("bolt://localhost:7687");
    const session = driver.session();
    try {
      const result = await session.executeWrite((tx) =>
        tx.run(
          'CREATE (a:Greeting) SET a.message = $message RETURN "Node " + id(a) + ": " + a.message',
          {
            message: "Hello, World!",
          }
        )
      );

      const singleRecord = result.records[0];
      const greeting = singleRecord.get(0);

      console.log(greeting);

      res.send("Welcome to Node.js quick start guide!")
    } finally {
      await session.close();
    }

    // On application exit:
    await driver.close();
  });

  app.listen(port, () => {
    console.log(`Example app listening at http://localhost:${port}`);
  });
Run the script
After running your script with node example.js and accessing the root URL
http://localhost:3000 in your web browser, you should receive the output in
your terminal similar to this:
Example app listening at http://localhost:3000
Node 1: Hello, World!
The output above indicates that you are connected to the database and ready to visualize the data you created.
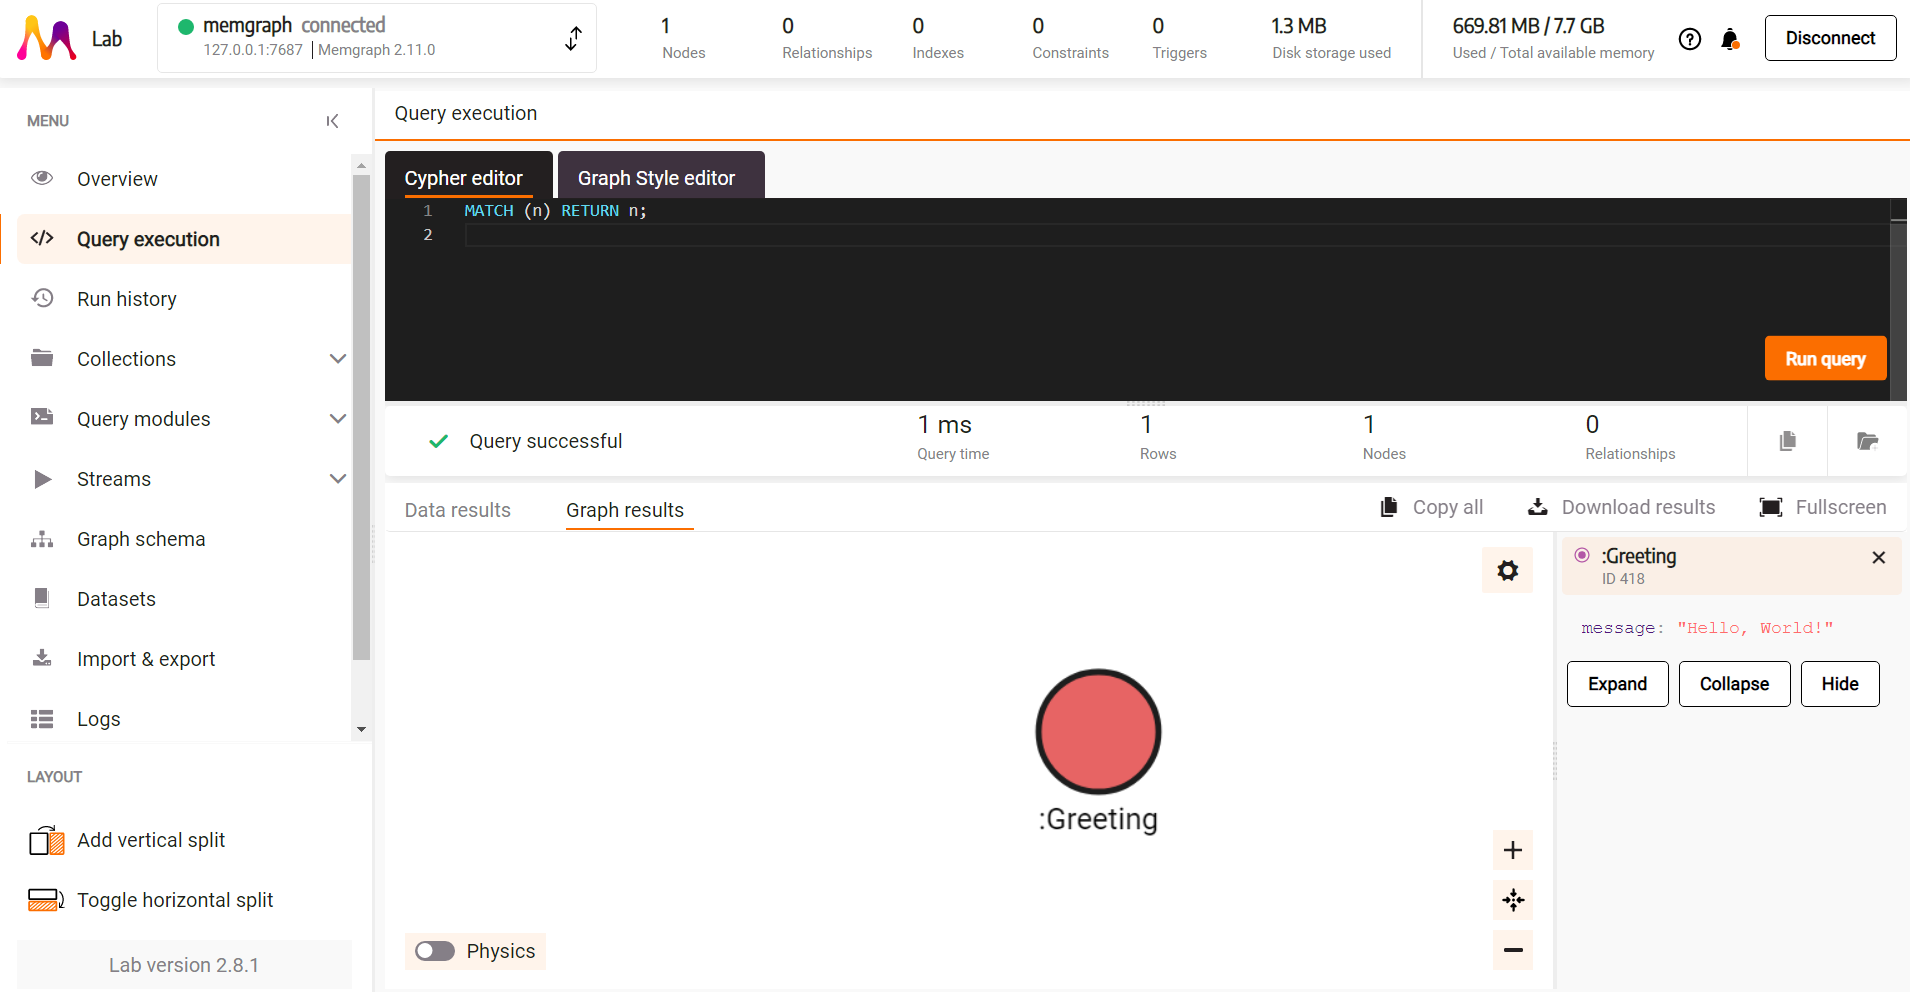
Visualize the data
To visualize the data created with the script, head over to localhost:3000 or the
desktop version of Memgraph Lab and run the following query in the
Query Execution tab:
MATCH (n) RETURN n;
The query visualizes the created node and by clicking on it you can explore its properties.
Next steps
You now have the basic application that connects you to Memgraph, you are ready to start building more complex queries on top of it. Happy querying!
Node.js app usage and examples
Once we covered the basic concept, we can explore more advanced usages of applications built with Node.js, explain code snippets and provide more examples.
Database connection
Once the database is running, you should be able to connect to it in one of two ways:
Connect without authentication (default)
By default, the Memgraph database is running without authentication, which means
that you can connect to the database without providing any credentials (username
and password). If you’re running Memgraph locally, the URI should be similar to
bolt://localhost:7687, and if you are running Memgraph on a remote server,
replace localhost with the appropriate IP address. If you ran Memgraph on a
port different than 7687, do not forget to update that in the URI too.
By default, you can set username and password argument as empty strings. This means that you are connecting without authentication.
To connect a Node.js application to the Memgraph database without authentication, you can use the following code snippet:
  const URI = 'bolt://localhost:7687';
  const USER = '';
  const PASSWORD = '';
  const driver = db.driver(URI, db.auth.basic(USER, PASSWORD));
  const session = driver.session();

  try {
    const result = await session.executeWrite((tx) =>
      tx.run(
        'CREATE (a:Connection) SET a.message = $message RETURN a.message',
        {
          message: "You are now connected to Memgraph!",
        }
      )
    );

    const singleRecord = result.records[0];
    const greeting = singleRecord.get(0);

    console.log(greeting);

    res.send("Welcome to Memgraph!")
  }
  catch (error) {
    console.error(error);
  }
  finally {
    await session.close();
  }

  await driver.close();
Connect with authentication
In order to set up authentication in Memgraph, you need to create a user with a
username and password. In Memgraph you can set a username and password by
executing the following query:
CREATE USER `memgraph` IDENTIFIED BY 'password';
Then, you can connect to the database with the following snippet:
  const URI = 'bolt://localhost:7687';
  const USER = 'memgraph';
  const PASSWORD = 'password';
  const driver = db.driver(URI, db.auth.basic(USER, PASSWORD));
  const session = driver.session();

  try {
    const result = await session.executeWrite((tx) =>
      tx.run(
        'CREATE (a:Connection) SET a.message = $message RETURN a.message',
        {
          message: "You are now connected to Memgraph!",
        }
      )
    );

    const singleRecord = result.records[0];
    const greeting = singleRecord.get(0);

    console.log(greeting);

    res.send("Welcome to Memgraph!")
  }
  catch (error) {
    console.error(error);
  }
  finally {
    await session.close();
  }

  await driver.close();
For more details on how to create user with credentials and set authentication, visit the Memgraph authentication guide.
Query the database
After connecting your driver to Memgraph, you can start running queries.
The simplest way to execute Cypher queries is by using the session.run method.
You can pass a Cypher query as a string to session.run and it returns a result
object that you can use to retrieve data from the query response.
Run a create query
The following code snippet contains a query that will create a node inside the database:
  const session = driver.session();
  try {
    const result = await session.executeWrite((tx) =>
      tx.run(`
        CREATE (n:Person {name: "Alice", age: 22})
        RETURN n.name as name
        `
      )
    );

    const singleRecord = result.records[0];
    const name = singleRecord.get('name');

    console.log(name);

    res.send("Visualize your data in Memgraph Lab.")
  }
  catch (error) {
    console.error(error);
  }
  finally {
    await session.close();
  }
The code above creates a session that executes Cypher query that creates a new node in the database. Next, it handles any potential errors that may occur during the execution. It follows best practices by closing the session the finally block to clean up resources and maintain proper database connection management.
Run a read query
The following code snippet contains a query that will read and retrieve data from the database:
  const session = driver.session();
  try{
    result = await session.executeRead((tx) =>
      tx.run(`
        MATCH (p:Person) WHERE p.name = 'Alice'
        RETURN p.name as name
        `
      )
    )
    for(let record of result.records) {
      console.log(record.get('name'))
    }

    res.send("Visualize your data in Memgraph Lab.")
  }
  catch (error) {
    console.error(error);
  } finally {
    session.close();
  }
Process the results
Processing results from the database is important since we do not want to lose any data during conversions. To properly read results and serve them back to the JavaScript application, they need to be cast into proper types.
Depending on the type of request made, you can receive different results, Nodes, Relationships, Paths etc. Let’s go over a few basic examples of how to handle different types and access properties of the returned results.
First, we’re going to create a dataset in order to provide input to process our results. If you wish to follow along, below are provided queries to recreate the same dataset used.
Dataset
  MATCH (n) DETACH DELETE n;
  CREATE (a:Node {id: 0, name: 'Michael', title:'Regional Manager'});
  CREATE (a:Node {id: 1, name: 'Dwight', title:'Assistant to the Regional Manager'});
  CREATE (a:Node {id: 2, name: 'Jim', title:'Salesman'});
  CREATE (a:Node {id: 3, name: 'Meredith', title:'Supplier Relations'});
  CREATE (a:Node {id: 4, name: 'Creed', title:'Quality Assurance Director'});
  CREATE (a:Node {id: 5, name: 'Angela', title:'Head of the Planning Committee'});
  MERGE (a:Node {id: 0}) MERGE (b:Node {id: 2}) CREATE (a)-[:BOSS_TO]->(b);
  MERGE (a:Node {id: 0}) MERGE (b:Node {id: 3}) CREATE (a)-[:BOSS_TO]->(b);
  MERGE (a:Node {id: 0}) MERGE (b:Node {id: 4}) CREATE (a)-[:BOSS_TO]->(b);
  MERGE (a:Node {id: 0}) MERGE (b:Node {id: 5}) CREATE (a)-[:BOSS_TO]->(b);
  MERGE (a:Node {id: 1}) MERGE (b:Node {id: 0}) CREATE (a)-[:WORKS_FOR]->(b);
  MERGE (a:Node {id: 1}) MERGE (b:Node {id: 1}) CREATE (a)-[:COLLEAGUE_TO]->(b);
  MERGE (a:Node {id: 1}) MERGE (b:Node {id: 2}) CREATE (a)-[:COLLEAGUE_TO]->(b);
  MERGE (a:Node {id: 2}) MERGE (b:Node {id: 1}) CREATE (a)-[:COLLEAGUE_TO]->(b);
  MERGE (a:Node {id: 2}) MERGE (b:Node {id: 4}) CREATE (a)-[:COLLEAGUE_TO]->(b);
  MERGE (a:Node {id: 2}) MERGE (b:Node {id: 5}) CREATE (a)-[:COLLEAGUE_TO]->(b);
  MERGE (a:Node {id: 4}) MERGE (b:Node {id: 0}) CREATE (a)-[:WORKS_FOR]->(b);
  MERGE (a:Node {id: 4}) MERGE (b:Node {id: 1}) CREATE (a)-[:COLLEAGUE_TO]->(b);
  MERGE (a:Node {id: 5}) MERGE (b:Node {id: 2}) CREATE (a)-[:COLLEAGUE_TO]->(b);
  MERGE (a:Node {id: 5}) MERGE (b:Node {id: 3}) CREATE (a)-[:COLLEAGUE_TO]->(b);
Process the Node result
In order to process the result, you need to read them first. You can do that with the following code snippet:
  const session = driver.session();
  try{
    result = await session.executeRead(async tx => {
      // Use the method `Transaction.run()` to run queries
      return await tx.run(`
        MATCH (n:Node) WHERE n.title = 'Regional Manager'
        RETURN "Id: " + n.id + ", Name: " + n.name + ", Title: " + n.title as output
        `
      )
    })
    // Process the result records
    for(let record of result.records) {
      console.log(record.get('output'))
    }

    res.send("Visualize your data in Memgraph Lab.")
  }
  catch (error) {
    console.error(error);
  } finally {
    session.close();
  }
The provided code snippet matches the node with the property title being
“Regional Manager”, runs a for loop through all the retrieved results and
processes them. Assuming that the matched node has properties id, name and
title, the output should be similar to this:
Id: 0, Name: Michael, Title: Regional ManagerProcess the Relationship result
You can also receive a relationship information from a query. Let’s say we want
to retrieve from the database all of the relationships with type WORKS_FOR:
  const session = driver.session();
  try{
    // Read a relationship between two nodes with 'WORKS_FOR' type
    result = await session.executeRead(async tx => {
      return await tx.run(`
        MATCH (a:Node)-[r:WORKS_FOR]->(b:Node) RETURN r;
        `
      )
    })

    // Process the results
    for(let record of result.records) {
      console.log(record.get('r'))
    }

    res.send("Visualize your data in Memgraph Lab.")
  }
  catch (error) {
    console.error(error);
  } finally {
    session.close();
  }
The console.log(record.get('r')) functions retrieve
all of the information about certain relationships. If you’re only
interested in, for example, the relationship type, ID of the start node and ID of
the end node, you can replace that line of code with the following code:
  console.log("Relationship type: ", record.get('r').type)
  console.log("Start node ID: ", record.get('r').startNodeElementId)
  console.log("End node ID: ", record.get('r').endNodeElementId)
It will produce the following output:
Relationship type:  USES
Start node ID:  <ID>
End node ID:  <ID>
Process the Path result
You can receive paths from the database. Let’s say we want
to retrieve all of the paths containing the connections of user named Michael.
Since we are only reading from the database, we’re going to use the executeRead
method:
  const session = driver.session();
  try{
    result = await session.executeRead(async tx => {
      return await tx.run(`
        MATCH p=(:Developer {name:'Michael'})-[]->() RETURN p
        `
      )
    })

    // Process the results
    for(let record of result.records) {
      console.log(record.get('p'))
    }

    res.send("Visualize your data in Memgraph Lab.")
  }
  catch (error) {
    console.error(error);
  } finally {
    session.close();
  }
Path will contain Nodes and Relationships, that can be accessed in the same way as in the previous examples, by casting them to the relevant type.
Transactions management
When querying the database, the driver automatically creates a transaction. A transaction is a unit of work that is either committed in its entirety or rolled back on failure. For more advanced use-cases, the driver provides functions to take full control over the transaction lifecycle.
On the driver side, if a transaction fails because of a transient error, the transaction is retried automatically. The transient error will occur during write conflicts or network failures. The driver will retry the transaction function with an exponentially increasing delay.
Automatic transactions
When you execute a query using session.run, the driver automatically creates
a transaction to encapsulate the Cypher queries you’re executing. This automatic
transaction management simplifies the process of working with transactions.
That method should be used when transaction control is unnecessary.
As of Memgraph version 3.2, queries are categorized as read or write and the corresponding storage access is taken. This allows for better query parallelization and higher throughput. For single query automatic transaction, no user input is required, Memgraph will deduce the access type needed at parse-time. See transaction accessor misalignment for more details.
Process partial results
When dealing with queries that may take considerable time to execute or have a lot of records being returned, it’s possible to handle partial results before the query reaches the set timeout. This is useful in scenarios where timeouts or other issues might interrupt the execution.
In the example below, due to the short timeout set on the query, it’s likely (and expected) that the query will be interrupted before completion. Therefore, it’s useful to handle the partial results that may be returned before the timeout occurs.
  const neo4j = require('neo4j-driver');
  const { finalize } = require('rxjs');

  const driver = neo4j.driver("bolt://localhost:7687");

  async function setup() {
    const session = driver.session();

    try {
      await session.run('MATCH (n) DETACH DELETE n');
      await session.run("UNWIND range(1, 500000) as id CREATE ()");
    } finally {
      session.close();
    }
  }

  setup()
    .then(
      () => {
        const session = driver.rxSession({ defaultAccessMode: 'READ' });
        session
          .run("MATCH (n) RETURN *;", // NOTE: A long query
            undefined,
            { timeout: 50 } // NOTE: with a short timeout
          )
          .records()
          .pipe(finalize(() => {
            session.close();
            driver.close();
          }))
          .subscribe({
            next: record => {
              console.log('Record:', record.toObject()); // Log the record to the console
            },
            complete: () => { console.info('complete'); process.exit(1); }, // UNEXPECTED
            error: error => console.error('Error:', error.message), // NOTE: expected to error with server side timeout
          });
      }
    )
Manual transactions
Before running a transaction, you need to obtain a session. Sessions act as concrete query channels between the driver and the server, and ensure causal consistency is enforced.
session = driver.session()
Sessions are not thread-safe, which means you can share the main Driver object across threads, but make sure each thread creates its own sessions.
Managed transactions
A transaction can contain any number of queries. As Memgraph is ACID compliant, queries within a transaction will either be executed as a whole or not at all. You cannot get a part of the transaction succeeding and another failing. Use transactions to group together related queries which work together to achieve a single logical database operation.
A managed transaction is created using the session.executeRead() and
session.executeWrite() methods, depending on whether you want to retrieve data
from the database or alter it. Both methods take a transaction function callback,
which is responsible for carrying out the queries and processing the results.
Here’s an example of a managed transaction using the session.executeRead()
method.
try {
  let session, result
  // Create a session
  session = driver.session()

  // The `.executeRead()` method is the entry point into a transaction
  result = await session.executeRead(async tx => {
    // Use the method `Transaction.run()` to run queries
    return await tx.run(`
      MATCH (p:Person) WHERE p.name = 'Alice'
      RETURN p.name as name ORDER BY name
      `
    )
  })
  // Process the result records
  for(let record of result.records) {
    console.log(record.get('name'))
  }
} finally {
  // Remember to close session when done
  session.close()
}
Within a transaction function, a return statement results in the transaction being committed, while the transaction is automatically rolled back if an exception is raised.
Because of this, it is impossible to know how many times the transaction is going to be executed, so transaction functions should produce the same results even when run several times. This means you shouldn’t, for example, edit or rely on globals. Note that although transaction functions might be executed multiple times, the queries inside it will always run only once.
As of Memgraph version 3.2, queries are categorized as read or write and the corresponding storage access is taken. This allows for better query parallelization and higher throughput.
Using executeRead and executeWrite informs Memgraph what type of access is required for the transaction.
An exception will be thrown if the user tries to execute a write query inside a read transaction. See transaction accessor misalignment for more details.
Explicit transactions
You can achieve full control over transactions by manually starting them using
the session.beginTransaction() method. You run queries inside an explicit
transaction with the Transaction.run() method, as you do in transaction
functions.
As of Memgraph version 3.2, queries are categorized as read or write and the corresponding storage access is taken. This allows for better query parallelization and higher throughput.
Explicit transactions can cover a number of individual queries, but storage access is given at the start. For best performance, the user needs to declare whether the transaction should use read or write access.
This can be done by setting the session’s defaultAccessMode to 'READ' or 'WRITE'. This will, in turn, set the access mode of a transaction created via the begin_transaction function. Note that executeRead and executeWrite will override the session’s default access.
let session = driver.session({ database: 'neo4j' })
let transaction = await session.beginTransaction()

// await transaction.run('<QUERY 1>')
// await transaction.run('<QUERY 2>')
// ...

await transaction.close()
await session.close()
The behavior and lifetime of an explicit transaction is controlled using the
Transaction.commit(), Transaction.rollback(), or Transaction.close()
methods.
Explicit transactions are useful when applications need to distribute Cypher execution across multiple functions for the same transaction or run multiple queries within a single transaction but without the automatic retries provided by managed transactions.
Process partial results
Similar to the example for the automatic transactions, partial results can be processed in the explicit transactions as well. The example below showcases handling such transactions:
  const neo4j = require("neo4j-driver");
  const { EMPTY } = require("rxjs");
  const { catchError, finalize, mergeMap, concatWith } = require("rxjs/operators");

  const driver = neo4j.driver("bolt://localhost:7687");

  async function setup() {
    const session = driver.session();

    try {
      await session.run('MATCH (n) DETACH DELETE n');
      await session.run("UNWIND range(1, 500000) as id CREATE ()");
    } finally {
      session.close();
    }
  }

  setup().then(() => {
    const rxSession = driver.rxSession({ defaultAccessMode: 'READ' });
    rxSession
      .beginTransaction({ timeout: 500 }) // NOTE: a short timeout
      .pipe(
        mergeMap(tx =>
          tx
            .run('MATCH (n) RETURN *;') // NOTE: a long query
            .records()
            .pipe(
              catchError(err => { tx.rollback(); throw err; }),
              concatWith(EMPTY.pipe(finalize(() => tx.commit())))
            )
        ),
        finalize(() => { rxSession.close(); driver.close() })
      )
      .subscribe({
        next: record => {
          console.log('Record:', record.toObject()); // Log the record to the console
        },
        complete: () => { console.info('complete'); process.exit(1); }, // UNEXPECTED
        error: error => console.error('Error:', error.message), // NOTE: expected to error with server side timeout
      });
  });
If you encounter serialization errors while using Node.js client, we recommend referring to our Serialization errors page for detailed guidance on troubleshooting and best practices.