Python client guide
Learn how to create a Python application that connects to the Memgraph database and executes simple queries.
Both Neo4j Python client and GQLAlchemy can be used to connect to Memgraph with Python. This guide will show how to use Neo4j Python client and for more information on GQLAlchemy, check out its documentation.
Memgraph and Neo4j both support Bolt protocol and Cypher queries, which means that same client can be used to connect to both databases. This is very convenient if switching between the two databases is needed. This guide is based on the client version v5 and above. Some examples may not be supported in older versions of the client.
Quickstart
The following guide will demonstrate how to start Memgraph, connect to Memgraph, seed the database with data, and run simple read and write queries.
Necessary prerequisites that should be installed in your local environment are:
Run Memgraph
If you’re new to Memgraph or you’re in a developing stage, we recommend using the Memgraph Platform. Besides the database, it also includes all the tools you might need to analyze your data, such as command-line interface mgconsole, web interface Memgraph Lab and a complete set of algorithms within a MAGE library.
Ensure Docker is running in the background. Depending on your operating system, execute the appropriate command in the console:
For Linux and macOS:
curl https://install.memgraph.com | shFor Windows:
iwr https://windows.memgraph.com | iexThe command above will start Memgraph Platform, which includes Memgraph database, Memgraph Lab and Memgraph MAGE. Memgraph uses Bolt protocol to communicate with the client using the exposed 7687 port. Memgraph Lab is a web application you can use to visualize the data. It’s accessible at http://localhost:3000 if Memgraph Platform is running correctly. The 7444 port enables Memgraph Lab to access and preview the logs, which is why both of these ports need to be exposed.
For more information visit the getting started guide on how to run Memgraph with Docker.
For Memgraph < 2.11, in order for the Neo4j driver to work, you need modify configuration
setting
--bolt-server-name-for-init. When running Memgraph, set
--bolt-server-name-for-init=Neo4j/5.2.0. If you use other version of Neo4j
driver, make sure to put the appropriate version number.
Create a directory
Next, create a directory for your project and positioning yourself in it:
mkdir hello-memgraph
cd hello-memgraph
Install Python client library
Before writing any code, you need to install the Python client library which requires Python >= 3.7, and can be installed with pip.
pip install neo4jCreate Python script
Now you can create a new file main.py and add the following code snippet:
from neo4j import GraphDatabase

# Define correct URI and AUTH arguments (no AUTH by default)
URI = "bolt://localhost:7687"
AUTH = ("", "")

with GraphDatabase.driver(URI, auth=AUTH) as client:
    # Check the connection
    client.verify_connectivity()

    # Create a user in the database
    records, summary, keys = client.execute_query(
        "CREATE (u:User {name: $name, password: $password}) RETURN u.name AS name;",
        name="John",
        password="pass",
        database_="memgraph",
    )

    # Get the result
    for record in records:
        print(record["name"])

    # Print the query counters
    print(summary.counters)

    # Find a user John in the database
    records, summary, keys = client.execute_query(
        "MATCH (u:User {name: $name}) RETURN u.name AS name",
        name="John",
        database_="memgraph",
    )

    # Get the result
    for record in records:
        print(record["name"])

    # Print the query
    print(summary.query)
Run the application
Now, you can run the application with the following command:
python3 main.pyIf everything was set up correctly, you should see the following output in the terminal:
John
{'labels_added': 1, 'labels_removed': 0, 'nodes_created': 1, 'nodes_deleted': 0, 'properties_set': 0, 'relationships_created': 0, 'relationships_deleted': 0}
John
MATCH (u:User {name: $name}) RETURN u.name AS name
Visualize data
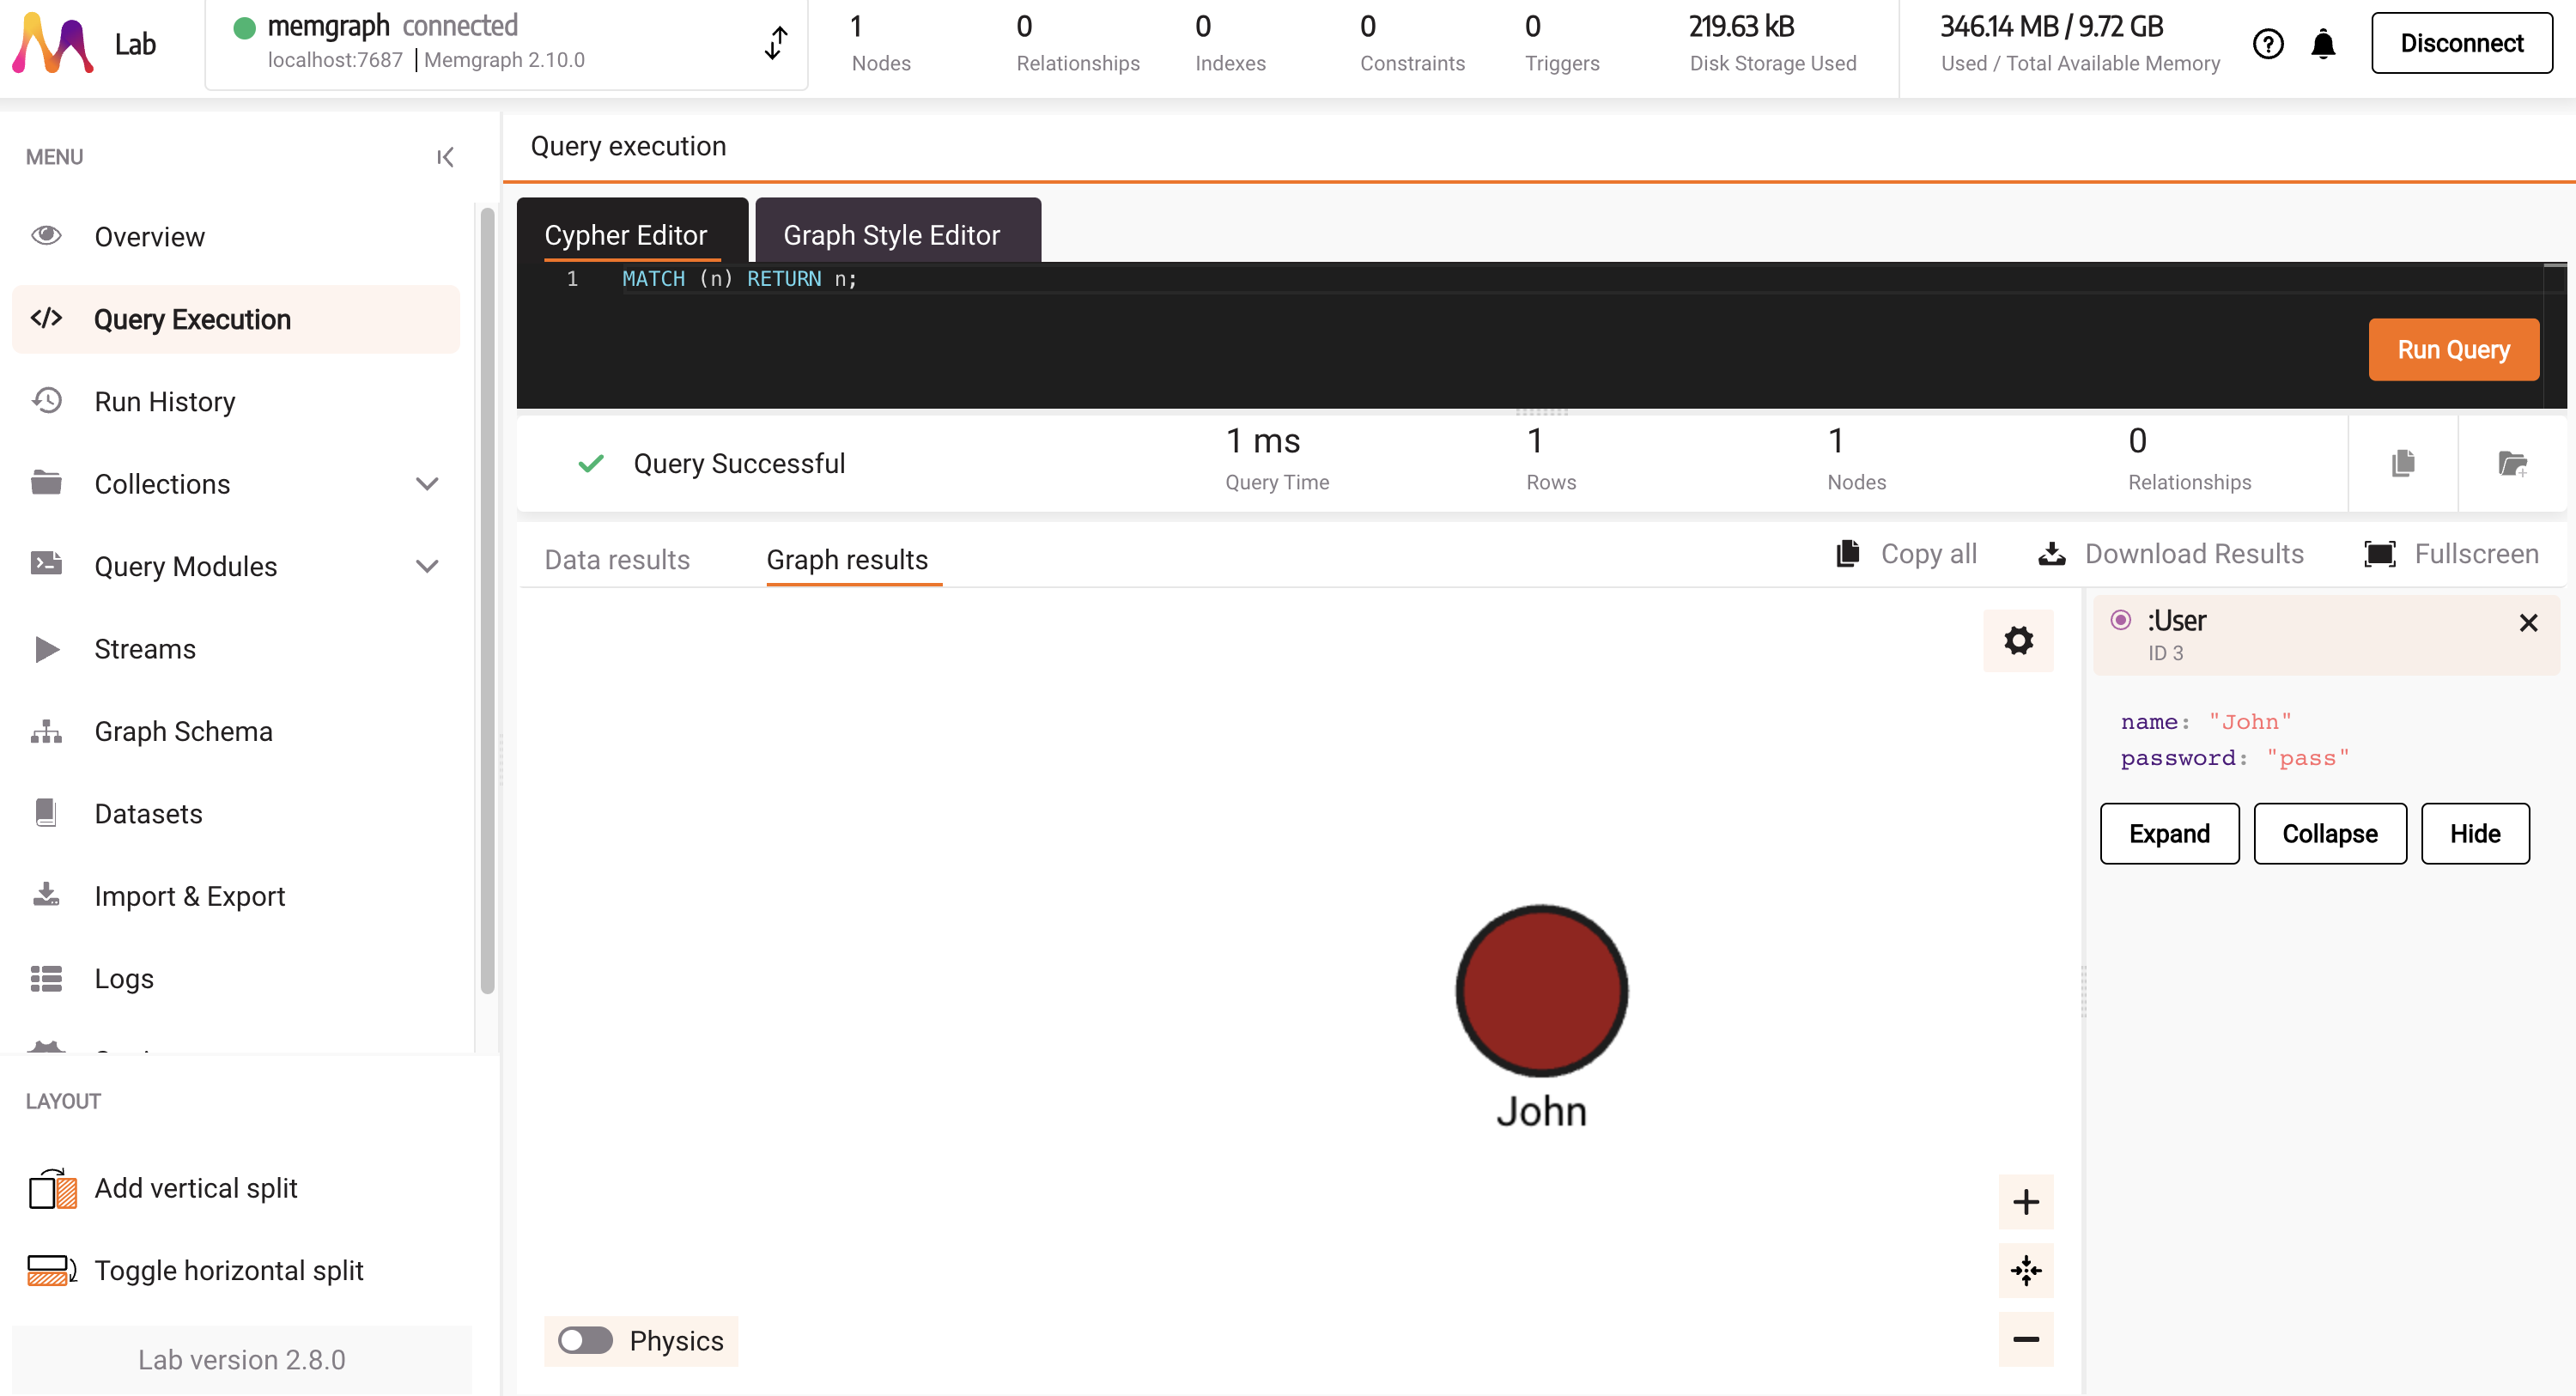
To visualize objects created in the database with the main.py script, head over to http://localhost:3000/ and run MATCH (n) RETURN n; in the Query Execution tab.
That query will visualize the created node. By clicking on a node, you can explore different properties.
Next steps
This makes a good starting point for Python application. For more information on how to use the Python client, continue reading the guide under Python client API usage and examples.
Python client API usage and examples
After a brief Quickstart guide, this section will go into more detail on how to use the Python client API, explain code snippets, and provide more examples. Feel free to skip to the section that interests you the most.
Database connection
Once the database is running and the client is installed or available in Python, you should be able to connect to the database in the following ways:
- Connect without authentication (default)
- Connect with authentication
- Connect with self-signed certificate
- Connect with Single sign-on (SSO)
- Impersonate a user
Connect without authentication (default)
By default, the Memgraph database is running without authentication, which means that you can connect to the database without providing any credentials (username and password).
To connect to Memgraph, create a client object with the appropriate URI and credentials arguments. If you’re running Memgraph locally, the URI should be similar to bolt://localhost:7687, and if you are running Memgraph on a remote server,
replace localhost with the appropriate IP address.
If you ran Memgraph on a port different than 7687, do not forget to update that in the URI too.
By default, you can set username and password in the AUTH("","") argument as empty strings. This means that you are connecting without authentication.
To connect a Go to the Memgraph database without authentication, you can use the following snippet:
from neo4j import GraphDatabase

URI = "bolt://localhost:7687"
AUTH = ("", "")

with GraphDatabase.driver(URI, auth=AUTH) as client:
    client.verify_connectivity()

    # Count the number of nodes in the database
    records, summary, keys = client.execute_query(
        "MATCH (n) RETURN count(n) AS num_of_nodes;"
    )

    # Get the result
    for record in records:
        print(record["num_of_nodes"])
Connect with authentication
In order to set up authentication in Memgraph, you need to create a user with a username and password. In Memgraph you can set a username and password by executing the following query:
CREATE USER `memgraphUser` IDENTIFIED BY 'memgraphPassword';Then, you can connect to the database with the following snippet:
from neo4j import GraphDatabase

URI = "bolt://localhost:7687"
AUTH = ("memgraphUser", "memgraphPassword")

with GraphDatabase.driver(URI, auth=AUTH) as client:
    client.verify_connectivity()

    # Count the number of nodes in the database
    records, summary, keys = client.execute_query(
        "MATCH (n) RETURN count(n) AS num_of_nodes;", database_="memgraph"
    )

    # Get the result
    for record in records:
        print(record["num_of_nodes"])
Notice that the first argument in auth is the username and the second is the password.
Connect with self-signed certificate
By adding bolt+ssc before the host address in the URI argument, the connection will be encrypted with a self-signed certificate. You will need to use the certificate if you want to connect to Memgraph Cloud instance.
When creating a project on Memgraph Cloud, you have a username and you create a password. After the project is started, Memgraph has assigned host address.
Copy those values and paste them in the <MEMGRAPH_HOST_ADDRESS>, <MEMGRAPH_USERNAME> and <MEMGRAPH_PASSWORD> fields in the code snippet below to connect successfully to the database.
from neo4j import GraphDatabase

URI = "bolt+ssc://<MEMGRAPH_HOST_ADDRESS>"
AUTH = (<MEMGRAPH_USERNAME>, <MEMGRAPH_PASSWORD>)


with GraphDatabase.driver(URI, auth=AUTH) as client:
    client.verify_connectivity()

    # Count the number of nodes in the database
    records, summary, keys = client.execute_query(
        "CREATE (u:User {name: $name, password: $password}) RETURN u.name AS name",
        name="John",
        password="pass",
        database_="memgraph",
    )

    # Get the result
    for record in records:
        print(record["name"])
Connect with Single sign-on (SSO)
This is currently only supported for OIDC SSO.
To use SSO with the Python driver, you need to get the access token and, optionally, the ID token yourself. One simple way to do it is to use the authlib library and follow the official tutorial.
To connect to the Memgraph database you have to use the custom_auth class with the scheme parameter set as oidc-entra-id, oidc-okta or oidc-custom depending on which scheme you are using,
credentials parameter set to contain the access token and optionally the ID token in the format shown in the example below. Finally, set principal and realm parameters to None.
The ID token is only required if your username configuration uses a field from the ID token (e.g., id:sub). If your username is configured to use a field from the access token (e.g., access:preferred_username), you can omit the ID token from the credentials string.
Below are examples of connecting to the Memgraph database using OIDC SSO with the custom auth scheme.
With both access and ID tokens:
with neo4j.GraphDatabase.driver(
    "bolt://localhost:7687",
    auth=neo4j.custom_auth(
        scheme="oidc-custom",
        credentials=f"access_token={token['access_token']};id_token={token['id_token']}",
        principal=None,
        realm=None,
    )
) as driver:
With access token only (when username is configured to use access token fields):
with neo4j.GraphDatabase.driver(
    "bolt://localhost:7687",
    auth=neo4j.custom_auth(
        scheme="oidc-custom",
        credentials=f"access_token={token['access_token']}",
        principal=None,
        realm=None,
    )
) as driver:
Impersonate a user
User impersonation is an Enterprise feature.
Once logged in, a user with the correct permissions can impersonate a different users during a session. This means that any query executing during that session will be executed as if the impersonated user executed it. The target user can be defined during session creation as in the following snippet:
with driver.session(impersonated_user="user1") as session:
    # queries here will be executed as if user1 executed them
Query the database
After connecting your client to Memgraph, you can start running queries. The simplest way to run queries is by using the execute_query() method which has an automatic transaction management.
Run a create query
The following query will create a node inside the database:
node = "CREATE (n:Technology {name:'Memgraph'});"
client.execute_query(node)
Due to the nature of the execute_query() method, transactions are handled automatically.
Run a read query
The following query will read the previously created node from the database:
node = "MATCH (n:Technology) RETURN n;"
result = client.execute_query(node)

for record in records:
    node = record["n"]
    print(node)
In this query, each record contains a node object behind the variable n.
Running queries with property map
query = "CREATE (n:Technology {id:$id, name: $name, description: $description});"
client.execute_query(query,
    id=1,
    name="MemgraphDB",
    description="Fastest graph database")
Using this approach, the queries will not contain hard-coded values, they can be more dynamic.
Process the results
Processing results from the database is important since we do not want to lose any data during conversions and properly read results and serve them back to the Python application. Python is dynamically typed language, which means that the type of the variable is determined at runtime, which is why we need to be careful when processing results.
Process the Node result
In order to process the result you need to read them first, you can do that by running the following query:
query = "MATCH (n:Technology) RETURN n;"
records, summary, keys = client.execute_query(query)
The execute_query() method returns a tuple of three elements: records, summary and keys. The records field contains all the records returned by the query. To process the results, you can iterate over the records and access the fields you need.
For example:
for record in records:
    node = record["n"]
    print(node)
<Node element_id='48' labels=frozenset({'Technology'}) properties={'description': 'Fastest graph database', 'id': 1, 'name': 'MemgraphDB'}>In the example above, each returned record, you can access the n field, which is a Node returned from a query.
You can access individual properties of the Node using one of the following options:
print(node)             # <Node element_id='47' labels=frozenset({'Technology'}) properties={'description': 'Fastest graph database', 'id': 1, 'name': 'MemgraphDB'}>
print(node.labels)      # frozenset({'Technology'})
print(node.element_id)  # 48
print(node["id"])       # 1
print(node["name"])     # MemgraphDB
Keep in mind that the element_id property returns the internal ID of the node, which is not the same as the user-defined ID, and it should not
be used for any application-level logic.
Process the Relationship result
You can also receive a relationship from a query. For example:
    query = "CREATE (u:User {name: 'John'})-[r:LOVES {id:99}]->(t:Technology {name: 'Memgraph'})"
    client.execute_query(query)

    query = "MATCH (u:User)-[r:LOVES]->(t:Technology) RETURN r"
    records, summary, keys = client.execute_query(query)
    for record in records:
        relationship = record["r"]
        print(relationship)
        print(relationship.element_id)
        print(relationship["id"])
        print(relationship.type)
        print(relationship.nodes)
You can access the Relationship properties just like the Node properties. Keep in mind that element_id is the internal ID of the relationship, which is not the same as the user-defined ID, and it should not be used for any application-level logic.
Process the Path result
You can receive path from the database, using the following construct:
query = "MATCH p=(d:User)-[r:LOVES]->(t:Technology) RETURN p"
records, summary, keys = client.execute_query(query)
for record in records:
    path = record["p"]
    print(path)
    print(path.nodes)
    print(path.relationships)
    print(path.start_node)
    print(path.end_node)
Path will contain Nodes and Relationships, that can be accessed in the same way as in the previous examples.
Transaction management
Transaction is a unit of work that is executed on the database, it could be some basic read, write or complex set of steps in form of series of queries. There can be multiple ways to mange transaction, but usually, they are managed automatically by the client or manually by the explicit code steps. Transaction management defines how to handle the transaction, when to commit, rollback, or terminate it.
On the driver side, if a transaction fails because of a transient error, the transaction is retried automatically. The transient error will occur during write conflicts or network failures. The driver will retry the transaction function with an exponentially increasing delay.
Automatic transaction management
To query the database, run the execute_query() procedure on the client object with the Cypher query argument, its parameters and the database name.
A good practice is to provide a database name as it avoids unnecessary requests to the server and, in that way, improves performance. It’s also recommended to provide parameters to protect your queries from Cypher injections.
In v2.10, Memgraph added the multi-tenant support to the Enterprise Edition to manage multiple isolated databases within a single instance. If you’re working with more than one tenant, be sure to provide the correct database name.
The execute_query() procedure automatically creates a transaction that can include multiple Cypher statements as a single query. If the transaction fails, the procedure will automatically rerun it.
Bolt protocol specifies additional metadata that can be sent along with the requested results. Metadata can be divided into two groups: query statistics and notifications. The query statistics metadata provides query counters that indicate the changes that the write query triggered on the server.
with GraphDatabase.driver(URI, auth=AUTH) as client:
    # Create a user in the database
    records, summary, keys = client.execute_query(
        "CREATE (u:User {name: $name, password: $password}) RETURN u.name AS name",
        name="John",
        password="pass",
        database_="memgraph",
    )

    # Get the result
    for record in records:
        print(record["name"])

    # Print the query counters
    print(summary.counters)
Read queries can be run in the same way, but they will not return any query counters because the read queries are not making any changes on the server. The summary will provide other information, such as the query that was run.
with GraphDatabase.driver(URI, auth=AUTH) as client:
    # Find a user John in the database
    records, summary, keys = client.execute_query(
        "MATCH (u:User {name: $name}) RETURN u.name AS name",
        name="John",
        database_="memgraph",
    )

    # Get the result
    for record in records:
        print(record["name"])

    # Print the query
    print(summary.query)
On update and delete queries it is again useful to get the query counters to be sure how your change affected the database.
Error with multicommand transactions
If you experience the Index manipulation not allowed in multicommand transactions error, use implicit (or auto-commit) transactions.
Implicit transactions are the simplest way to run Cypher queries because they aren’t automatically rerun as they are in the execute_query() procedure or when using managed transactions.
To create a label-property index on :User(name), run the following code:
with GraphDatabase.driver(URI, auth=AUTH).session(database="memgraph") as session:
    session.run("CREATE INDEX ON :User(name);")
Manual transaction
When using the execute_query() procedure, you don’t have complete control over the transaction lifecycle because it creates a transaction that can only be committed or rolled back on failure.
If you want more control over the query execution, use managed transactions to run the queries.
To run a managed transaction, you first need to create a session:
my_session = client.session(database="memgraph")
# do something with the session
my_session.close()
Don’t forget to close the session after usage with session.close() or Python with statement, which will automatically close a session, like in the following code snippet:
with client.session(database="memgraph") as session:
    # do something with the session

# session is automatically closed
Sessions are not thread safe, so make sure that each thread creates its own sessions. On the other hand, the main client object can be shared across threads. One transaction can contain multiple queries, and they will either all be executed or none will. This means that you don’t have to worry about rolling back the part of the changes that got executed in that transaction and finding the ones that didn’t. Having more than one query in a transaction is useful when the queries work on a similar database task, usually creating graph database objects.
With sessions, you can run:
- Managed transactions - run multiple queries with automatic retries without the possibility to roll back a query within a transaction.
- Explicit transactions - get complete control over transactions by explicitly controlling the end of a transaction that won’t be automatically retried.
- Implicit transactions - run a Cypher query that won’t be automatically retried.
Managed transactions
To create a managed transaction, use Session.execute_read() procedure for read queries and Session.execute_write() procedure for write queries.
As of Memgraph version 3.2, queries are categorized as read or write and the corresponding storage access is taken. This allows for better query parallelization and higher throughput. An exception will be thrown if the user tries to execute a write query inside a read transaction. For more details, see transaction accessor misalignment.
def match_user(tx, name):
    result = tx.run(
        """
        MATCH (u:User) WHERE startsWith(u.name, $user_name)
        RETURN u.name as name
        """,
        user_name=name,
    )
    # process the result
    return list(result)


with GraphDatabase.driver(URI, auth=AUTH) as client:
    with client.session(database="memgraph") as session:
        people = session.execute_read(
            # transaction function callback
            match_user,
            "John",
        )
        for person in people:
            # get the result record as dict (key: value)
            print(person.data())
If an exception is raised, the transaction will be automatically rolled back. If there is a return statement within the transaction function, the transaction will be committed. Sometimes, if a transaction fails, it is automatically rerun. That means that you can’t be sure how many times a transaction function will be executed, so you have to be careful that it produces the same effect when run multiple times. The queries inside the transaction function will always run only once. A session can contain multiple transactions, but only one transaction is active at any given time within the session. To maintain multiple concurrent transactions, use multiple concurrent sessions.
Explicit transactions
With explicit transactions, you can get complete control over transactions. To begin a transaction, run Session.begin_transaction() procedure and to run a transaction, use Transaction.run() procedure.
Explicit transactions offer the possibility of explicitly controlling the end of a transaction with Transaction.commit(), Transaction.rollback() or Transaction.close() methods.
As of Memgraph version 3.2, queries are categorized as read or write and the corresponding storage access is taken. This allows for better query parallelization and higher throughput.
Explicit transactions can cover a number of individual queries, but storage access is given at the start. For best performance, the user needs to declare whether the transaction should use read or write access.
This can be done by setting the session’s default_access_mode to "r" or "w". This will, in turn, set the access mode of a transaction created via the begin_transaction function. Note that execute_read and execute_write will override the session’s default access.
Use explicit transaction if you need to distribute Cypher execution across multiple functions for the same transaction or if you need to run multiple queries within a single transactions without automatic retries.
The following example shows how to explicitly control the transaction of changing account balances based on a token transfer:
def create_users(client, sender, receiver):
    # Run multiple statements in a single query with execute_query() - not an explicit transaction
    # If there is a failure, it will be rolled back
    summary = client.execute_query(
        """
            CREATE (:User {id: $sender_id, name: $sender_name, account_balance: $sender_account_balance})
            CREATE (:User {id: $receiver_id, name: $receiver_name, account_balance: $receiver_account_balance})
        """,
        sender_id=sender["id"],
        sender_name=sender["name"],
        sender_account_balance=sender["account_balance"],
        receiver_id=receiver["id"],
        receiver_name=receiver["name"],
        receiver_account_balance=receiver["account_balance"],
    ).summary

    print(
        "Created {nodes_created} nodes.".format(
            nodes_created=summary.counters.nodes_created
        )
    )


def transfer_tokens(client, sender_id, receiver_id, num_of_tokens):
    with client.session(database="memgraph", default_access_mode="w") as session:
        tx = session.begin_transaction()

        try:
            if not is_enough_token(tx, sender_id, num_of_tokens):
                print("Not enough tokens in the account balance.")
                return
            try:
                decrease_sender_balance(tx, sender_id, num_of_tokens)
                increase_receiver_balance(tx, receiver_id, num_of_tokens)
                tx.commit()  # both should be committed or none
            except Exception as e:
                raise e  # if exception happened roll back both
        finally:
            tx.close()  # rolls back if not yet committed


def is_enough_token(tx, user_id, num_of_tokens):
    query = """
        MATCH (u:User {id: $id})
        RETURN u.account_balance - $num_of_tokens >= 0 AS is_enough
    """
    result = tx.run(query, id=user_id, num_of_tokens=num_of_tokens)
    record = result.single(strict=True)
    return record["is_enough"]


def decrease_sender_balance(tx, sender_id, num_of_tokens):
    query = """
        MATCH (u:User {id: $id})
        SET u.account_balance = u.account_balance - $num_of_tokens
    """
    result = tx.run(query, id=sender_id, num_of_tokens=num_of_tokens)
    result.consume()


def increase_receiver_balance(tx, receiver_id, num_of_tokens):
    query = """
        MATCH (u:User {id: $id})
        SET u.account_balance = u.account_balance + $num_of_tokens
    """
    result = tx.run(query, id=receiver_id, num_of_tokens=num_of_tokens)
    result.consume()


def main():
    # If John has < 10 on his account balance, he won't have enough to send 10 tokens to Jenna
    sender = {"id": 1, "account_balance": 1000, "name": "John"}
    receiver = {"id": 2, "account_balance": 2000, "name": "Jenna"}

    with GraphDatabase.driver(URI, auth=AUTH) as client:
        create_users(client, sender, receiver)
        transfer_tokens(client, 1, 2, 10)


if __name__ == "__main__":
    main()
In the above example, if John’s account balance is changed to a number less than 10, you will be warned that he doesn’t have enough tokens and the transfer won’t happen (it will be rolled back).
Implicit transactions
Implicit or auto-commit transactions are the simplest way to run a Cypher query since they won’t be automatically retried as with execute_query() procedure or managed transactions.
With implicit transactions, you don’t have the same control of transaction as with explicit transactions, so they are mostly used for quick prototyping.
As of Memgraph version 3.2, queries are categorized as read or write and the corresponding storage access is taken. This allows for better query parallelization and higher throughput. Access mode is automatically determined when executing single queries through implicit transactions.
To run an implicit transaction, use the Session.run() method:
with GraphDatabase.driver(URI, auth=AUTH) as client:
    with client.session(database="memgraph") as session:
        session.run("CREATE (u:User {name: $name})", name="John")
The Session.run() method is most commonly used for LOAD CSV clause to prevent timeout errors due to the size of the transaction.
Concurrent transactions
It is possible to run concurrent transactions with Python’s client by leveraging threads or processes.
Using threads could cause your code to be partially locked because of Global interpreter lock (GIL),
resulting in slow execution. Hence, it is always better to run your workloads in separate processes,
where each process will have its own interpreter and memory space, avoiding GIL issues. To leverage multiple concurrent processes, you can use Python’s multiprocessing module.
Here is an example of how to run concurrent transactions with multiprocessing module:
import multiprocessing
from neo4j import GraphDatabase

HOST_PORT = "bolt://localhost:7687"

def process_chunk(query, create_list):
    try:
        driver = GraphDatabase.driver(HOST_PORT, auth=("", ""))
        with driver.session() as session:
            session.run(query, {"batch": create_list})
        driver.close()
    except Exception as e:
        print("Failed to execute chunk: ", e)
        raise e


query = """
WITH $batch AS nodes
UNWIND nodes AS node
CREATE (n:Node {id:node.id})
"""

chunks = [[{"id": i} for i in range(1000)] for _ in range(10)]
with multiprocessing.Pool(10) as pool:
    pool.starmap(process_chunk, [(query, chunk) for chunk in chunks])
Each process will execute a query that contains a chunk of nodes.
You can control the number of concurrent transactions and processes by
specifying the number of processes in the multiprocessing.Pool constructor.
Each transaction will be a separate connection to the database and will be
executed in parallel on a different process. This number should align with your
system’s capabilities. If you have 32 cores, you can run 32 processes, but if
you have only four cores, it would be more efficient to run only four processes.
Running transactions in parallel can be very efficient, but it can lead to conflicting transactions. The typical scenario is when two transactions try to update the same node simultaneously, or add a relationship to the same node. It is a write-write conflict between transactions. In this case, the first transaction will pass, and one of the transactions will fail, and you will need to handle the error and retry the transaction.
If you are running transactions in parallel, you should avoid implicit transactions because you can’t control the execution process, and there are no retries.
You can use the managed transactions or explicit transactions to handle the conflicting transactions. Explicit API provides full control of the process, and it is recommended for production use and handling conflicts.
Here is an example of how to handle conflicting transactions in explicit API:
def process_chunk(query, create_list, max_retries=100, initial_wait_time=0.200, backoff_factor=1.1, jitter=0.1):
    session = GraphDatabase.driver(HOST_PORT, auth=("", "")).session()
    for attempt in range(max_retries):
        try:
            with session.begin_transaction() as tx:
                tx.run(query, {"batch": create_list})
                tx.commit()
                break
        except TransientError as te:
            jitter = random.uniform(0, jitter) * initial_wait_time
            wait_time = initial_wait_time * (backoff_factor ** attempt) + jitter
            print(f"Commit failed on attempt {attempt+1}. Retrying in {wait_time} seconds...")
            time.sleep(wait_time)
        except Exception as e:
            print(f"Failed to execute transaction: {e}")
            session.close()
            raise e
In the example above, we are using the begin_transaction() method to start a
transaction, and then we are running the query inside the transaction. If the
transaction fails with a TransientError, the transaction will be retried using
the retry strategy. Otherwise, another error occurred, and the transaction
should be aborted.
The essential aspects of the retry strategy are the following arguments:
max_retries- the maximum number of retries before the transaction will be aborted with a timeout error. This number should be set based on the expected number of conflicts and the time that the transaction will be running. If the commit takes a second and you have 120 retries, the transaction will be running for 2 minutes + waiting time.initial_wait_time- the time that the transaction will wait before the first retry. The first time a transaction fails with conflict, it will wait forinitial_wait_timeseconds before the first retry.backoff_factor- the factor by which the retry delay will be multiplied after each retry. This number should not be too high because it can lead to long-running transactions; if commits are small and fast, avoid exponential backoff.jitter- the factor by which the retry delay will be randomized after each retry. If there are a lot of transactions running in parallel, it is recommended to usejitterto avoid the thundering herd problem.
If you use managed transactions, you can configure the retry scenario to use the session configuration. Here is an example:
import multiprocessing
from neo4j import GraphDatabase

HOST_PORT = "bolt://localhost:7687"

def process_chunk_managed_API(query, create_list):
    driver = GraphDatabase.driver(HOST_PORT, auth=("", ""))
    with driver.session(max_transaction_retry_time=180.0, initial_retry_delay=0.2, retry_delay_multiplier=1.1, retry_delay_jitter_factor=0.1) as session:
        session.execute_write(lambda tx: tx.run(query, {"batch": create_list}))
    driver.close()

query = """
WITH $batch AS nodes
UNWIND nodes AS node
MATCH (a:Node {id: node.a}), (b:Node {id: node.b}) CREATE (a)-[:RELATIONSHIP]->(b)
"""

chunks = [[{"a": i, "b": i+1} for i in range(1000)] for _ in range(10)]
with multiprocessing.Pool(10) as pool:
    pool.starmap(process_chunk_managed_API, [(query, chunk) for chunk in chunks])
In this case, the TransientError will be retried using the retry strategy that is configured in the session object. You do not need to handle the retry logic; it is handled by the driver in the background.
The essential configuration arguments are the following:
max_transaction_retry_time- the maximum time the transaction will be retried; after that, it will be aborted with a timeout error.initial_retry_delay- the time that the transaction will wait before the first retry.retry_delay_multiplier- the factor by which the retry delay will be multiplied after each retry.retry_delay_jitter_factor- the factor by which the retry delay will be randomized after each retry.
If you are still struggling with conflicts and serialization errors while using a Python client, we recommend referring to our Serialization errors page for detailed guidance on troubleshooting and best practices.