How to create a query module in Python
The Python API provided by Memgraph lets you develop query modules. It is accompanied by the mock API, which makes it possible to develop and test query modules for Memgraph without having to run a Memgraph instance.
Python API
Python API is defined in the mgp module that can be found in the Memgraph
installation directory /usr/lib/memgraph/python_support. In essence, it is a
wrapper around the C API. If you wish to write your own query modules using the
Python API, you need to have Python version 3.5.0 or above installed.
For more information, check the Python API reference
guide.
We also made an example module to
help you start developing your own modules.
You can develop query modules in Python from Memgraph Lab (v2.0 and newer). Just navigate to Query Modules and click on New Module to start.
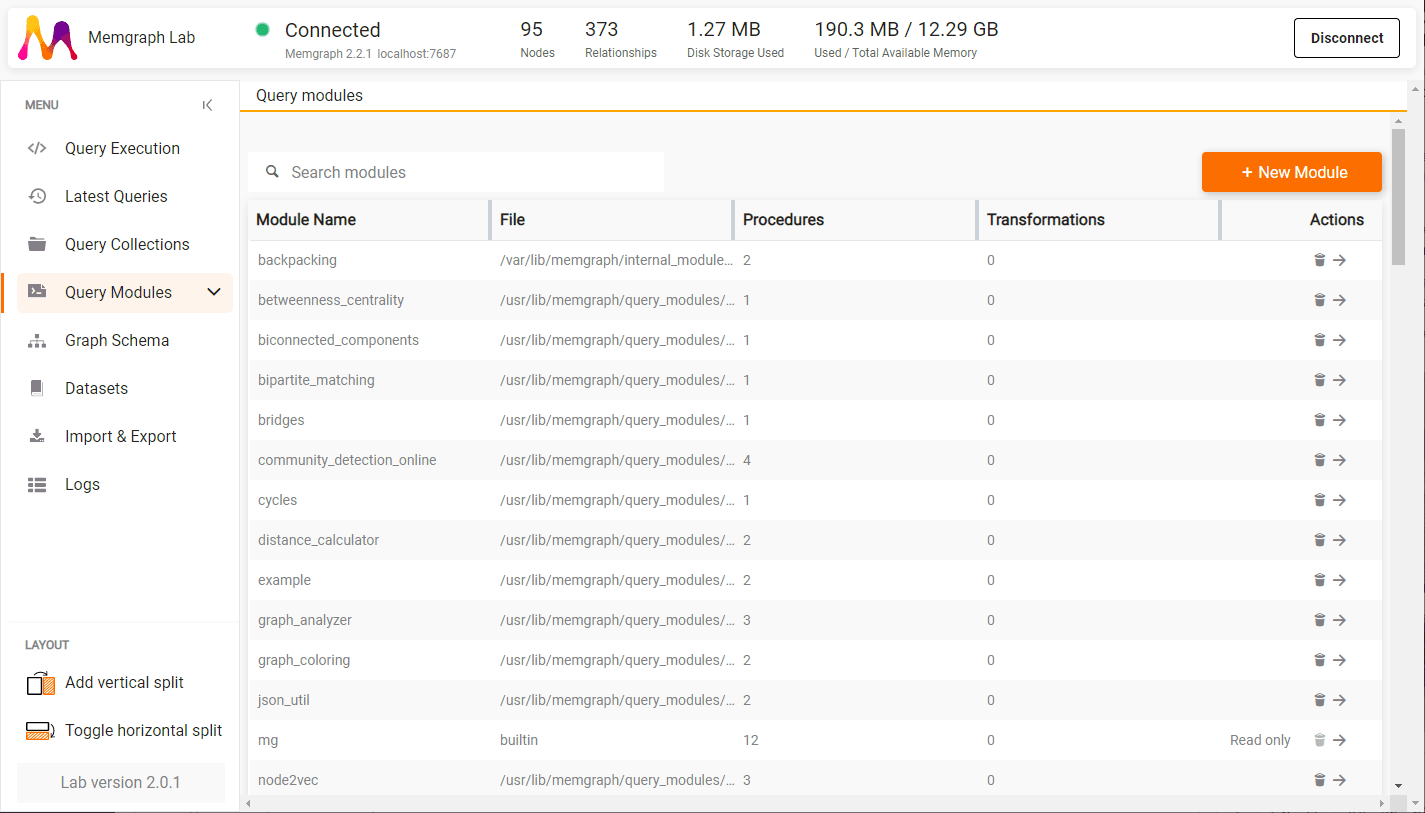
Custom modules developed via Memgraph Lab are located at
/var/lib/memgraph/internal_modules.
Mock Python API
The mock Python query module API enables you to develop and test query modules for Memgraph without having to run a Memgraph instance by simulating its behavior. As the mock API is compatible with the Python API, you can add modules developed with it to Memgraph as-is, without modifying the code.
For more information and examples, check the mock Python API reference guide.
Install external Python libraries
It is possible to install Python libraries that are not already included with
Memgraph installation. For example, to install pandas with Memgraph running
inside a Docker container, run the following command in the terminal:
docker exec -i -u memgraph <container_id> bash -c "apt install -y python3-pip &&
pip install pandas"
Don’t forget to replace <container_id> with the appropriate value, which you can
find by running docker ps command in the terminal.
If you are starting Memgraph with Docker Compose, write the following commands in the Dockerfile:
FROM memgraph/memgraph:latest

USER memgraph

RUN apt install -y python3-pip
RUN pip install pandas
Python libraries should now be installed as the memgraph user, which is the
default user inside the Memgraph container. You no longer need to switch to the
root user to perform installations.
Example
In this tutorial, we will learn how to develop a query module in Python on the example of the random walk algorithm.
Prerequisites
There are three options for installing and working with Memgraph MAGE:
- install MAGE development environment from Docker Hub
- build MAGE using the
docker buildcommand - build MAGE from source
Developing a module
Position yourself in the MAGE repository you cloned earlier. Specifically,
go in the python subdirectory and create a new file named random_walk.py.
mage
└── python
    └── random_walk.py
For coding the query module, we’ll use the
mgp package that has the Memgraph Python
API including the key graph data structures:
Vertex and
Edge.
To install mgp, run pip install mgp.
Here’s the code for the random walk algorithm:
import mgp
import random


@mgp.read_proc
def get_path(
    start: mgp.Vertex,
    length: int = 10,
) -> mgp.Record(path=mgp.Path):
    """Generates a random path of length `length` or less starting
    from the `start` vertex.

    :param mgp.Vertex start: The starting node of the walk.
    :param int length: The number of edges to traverse.
    :return: Random path.
    :rtype: mgp.Record(mgp.Path)
    """
    path = mgp.Path(start)
    vertex = start
    for _ in range(length):
        try:
            edge = random.choice(list(vertex.out_edges))
            path.expand(edge)
            vertex = edge.to_vertex
        except IndexError:
            break

    return mgp.Record(path=path)
The get_path is decorated with the @mgp.read_proc decorator, which tells
Memgraph it’s a read procedure, meaning it won’t make changes to the graph.
The path is created from the start node, and edges are appended to it
iteratively.
Terminate procedure execution
Just as the execution of a Cypher query can be terminated with TERMINATE TRANSACTIONS "id"; query,
the execution of the procedure can as well, if it takes too long to yield a
response or gets stuck in an infinite loop due to unpredicted input data.
Transaction ID is visible upon calling the SHOW TRANSACTIONS; query.
In order to be able to terminate the procedure, it has to contain function
ctx.check_must_abort() which precedes crucial parts of the code, such as
while and until loops, or similar points where the procedure might become
costly.
Consider the following example:
import mgp

@mgp.read_proc
def long_query(ctx: mgp.ProcCtx) -> mgp.Record(my_id=int):
    id = 1
    try:
        while True:
            if ctx.check_must_abort():
                break
            id += 1
    except mgp.AbortError:
        return mgp.Record(my_id=id)
The mgp.AbortError: ensures that the correct message about termination is sent
to the session where the procedure was originally run.
Importing, querying and testing a module
Now in order to import, query and test a module, check out the following page.
Feel free to create an issue or open a pull request on our GitHub
repo to speed up the development.
Also, don’t forget to throw us a star on GitHub. :star:
Working with the mock API
The mock Python API lets you develop and test query modules for Memgraph without having to run a Memgraph instance. As it’s compatible with the Python API you can add modules developed with it to Memgraph as-is, without having to refactor your code.
The documentation on importing the mock API and running query modules with it is available here, accompanied by examples.
Managing Memgraph’s Python environment
After some time, any production system requires updates for the packages it
uses. For example, when developing a new query module that requires the latest
networkx version.
If Memgraph is already deployed somewhere with an installed networkx package,
you would probably like to use some package manager, e.g. pip or conda, to
delete the old networkx, and install a new networkx package. You definitely
wouldn’t want to redeploy the whole Memgraph just because of one Python package.
However, Python caches all modules, packages and the compiled bytecode, so this
procedure cannot work out of the box. So after installing the new package, you
need to use the utility procedure mg.load_all().
So the whole process looks like this:
Uninstall the old package:
pip uninstall networkxInstall a new package:
pip install networkx=<new_version>Reload all query modules:
CALL mg.load_all();