Guide to Transition from Py2neo to GQLAlchemy
In the evolving world of graph database technology, it's crucial for developers to stay up-to-date with the latest tools and libraries to ensure the efficiency of their projects. If you've been using py2neo, you may have noticed that it's no longer an actively maintained library. This blog post is here to guide you through a seamless transition to Memgraph's GQLAlchemy.
Memgraph's GQLAlchemy is a Python library designed to work seamlessly with the Memgraph graph database. Not only does it serve as an excellent alternative to py2neo, which was a Python library for Neo4j, but it also opens up new possibilities for working with graph data. Both libraries allow you to perform common graph operations and queries, such as creating nodes, relationships, updating your database and running algorithms on the graph. Memgraph is open source so you can also find GQLAlchemy’s implementation on GitHub, as well as the documentation with all of the examples of possibilities GQLAlchemy offers.
In order to get started with the guide, we first need to have a running Memgraph instance.
Running a Memgraph instance
There are multiple ways of getting started with Memgraph, but the easiest one is to run a Memgraph instance using Docker. With the Docker running in the background, run the following command in your terminal:
docker run -p 7687:7687 -p 7444:7444 -p 3000:3000 --name memgraph memgraph/memgraph-platform
Besides the database, memgraph-platform image also includes all the tools you might need to analyze your data, such as web interface Memgraph Lab and a complete set of algorithms within a MAGE library. Now you can access your Memgraph instance in the desktop version of Memgraph Lab or by visiting the browser version on localhost:3000.
Creating a graph
After running Memgraph, you can run Cypher queries directly from Memgraph Lab to create nodes, relationships and manage the database, but here we’ll explore how to do that using a Python client library. We’ll showcase how it was previously accomplished in Neo4j using py2neo and how to accomplish it in Memgraph using GQLAlchemy. We’re going to connect to the database from your Python script using the GQLAlchemy object graph mapper (OGM) and execute Cypher queries.
Setting everything up
To get started with GQLAlchemy, first we need to install it by running the following command:
pip install gqlalchemy==1.2.0
After installing it, in order to get started, open up your preferred Python editor and make sure you have a running Memgraph instance.
Connecting to the database is done similarly as when using py2neo. Below you can see the code snippet of both examples:
from py2neo import Graph, Database
from py2neo.ogm import *

def main():
	graph = Graph("bolt://localhost:7687")


if __name__=="__main__":
	main()
from gqlalchemy import Memgraph
def main():
memgraph = Memgraph("127.0.0.1", 7687)
if __name__=="__main__":
main()The code establishes a connection to a Memgraph server running locally on the default port 7687 that both Memgraph and Neo4j are listening to.
Creating nodes and relationships in py2neo
Before creating nodes and relationships using py2neo, import all the necessary classes:
from py2neo.data import Node, RelationshipThen, create three new nodes in the database, all of them with the label Person and property name.
Alex = Node(“Person”,name=”Alex”)
Anna= Node(“Person”,name=”Anna”)
John=Node(“Person”,name=”John”)
However, the code above just creates the nodes and doesn’t save them into the database, so to actually push them into the database, use the following code:
from py2neo import Graph, Database
from py2neo.data import Node, Relationship
from py2neo.ogm import *

def main():
	graph = Graph("bolt://localhost:7687")
    Alex = Node(“Person”,name=”Alex”)
    Anna= Node(“Person”,name=”Anna”)
    John=Node(“Person”,name=”John”)
    graph.create(Alex)
    graph.create(Anna)
    graph.create(John)


if __name__=="__main__":
	main()
To draw out relationship, that indicates that, for example, Anna is friends with John, create a Relationship using the following syntax:
Relationship (Anna, "FRIENDS_WITH", John)The Relationship can be placed straight into the graph.create() function:
graph.create(Relationship(Anna, "FRIENDS_WITH", John))The code that defines all the necessary nodes and relationships, now looks like this:
from py2neo import Graph, Database
from py2neo.data import Node, Relationship
from py2neo.ogm import *

def main():
	graph = Graph("bolt://localhost:7687")
    Alex = Node(“Person”,name=”Alex”)
    Anna= Node(“Person”,name=”Anna”)
    John=Node(“Person”,name=”John”)
    graph.create(Alex)
    graph.create(Anna)
    graph.create(John)
    graph.create(Relationship(Anna, "FRIENDS_WITH", John))
    graph.create(Relationship(Anna, "FRIENDS_WITH", Alex))
    graph.create(Relationship(John, "FRIENDS_WITH", Alex))


if __name__=="__main__":
	main()
Creating nodes and relationships in GQLAlchemy
Similar to py2neo, first import all the necessary classes from GQLAlchemy:
from gqlalchemy import Memgraph, Node, RelationshipAfter that, create classes representing nodes:
class Person(Node):
    id: str
    name: str
Node is a Python class which maps to a graph object in Memgraph. Class Person maps to a single :Person label with properties id and name. After creating a class representing the Person node, use the following code to create and save node objects:
from gqlalchemy import Memgraph
from gqlalchemy import Memgraph, Node, Relationship
class Person(Node):
id: str
name: str
def main():
memgraph = Memgraph("127.0.0.1", 7687)
Alex = Person(id="1", name="Alex").save(memgraph)
Anna = Person(id="2", name="Anna").save(memgraph)
John = Person(id="3", name="John").save(memgraph)
if __name__=="__main__":
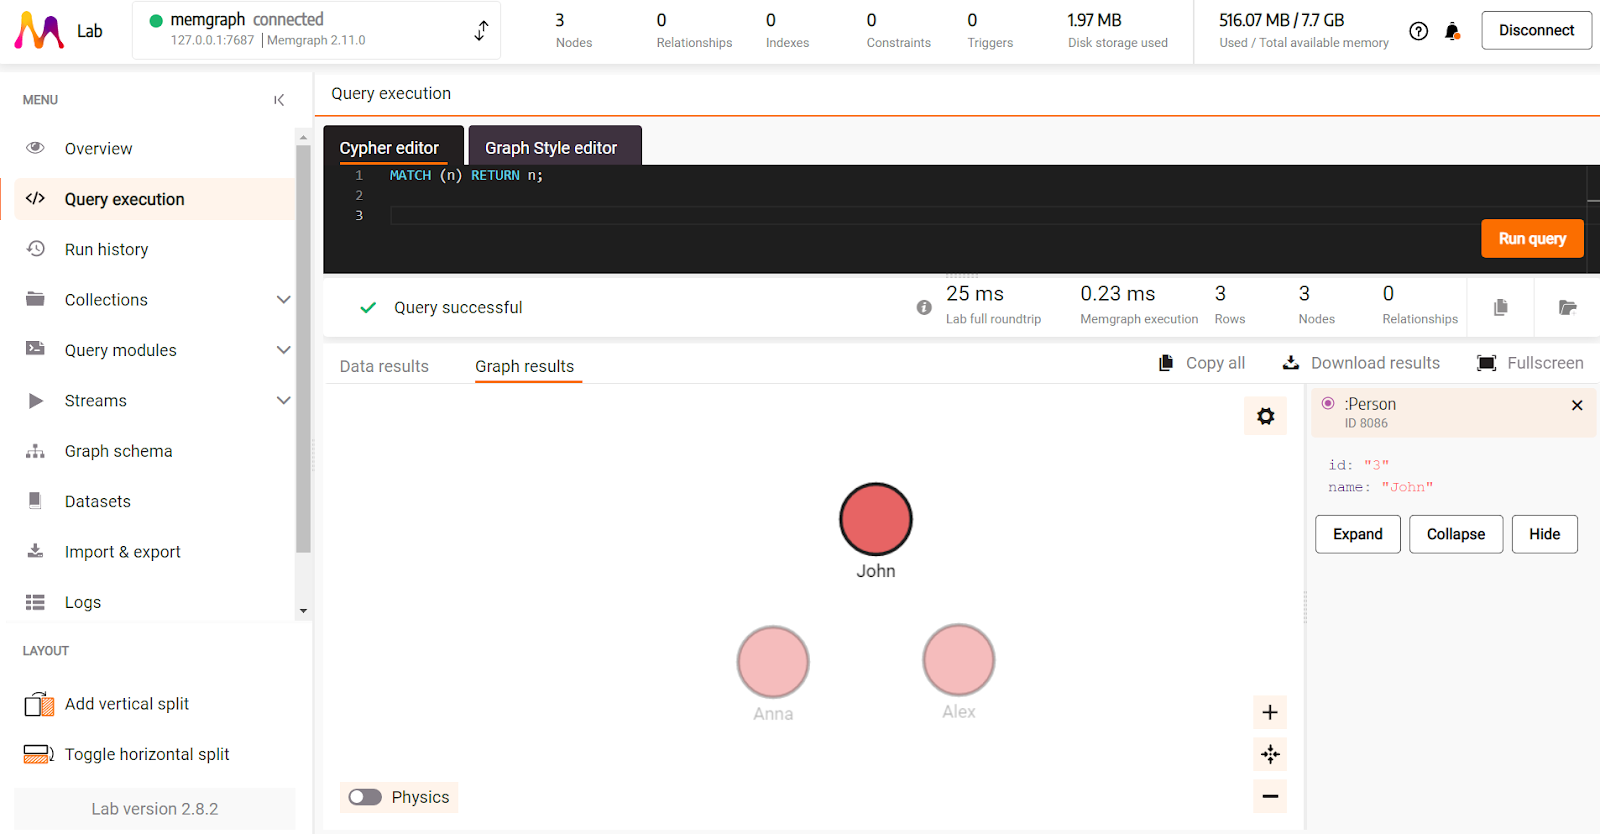
main()The code should have created three new nodes in the database. You can visualize these nodes in Memgraph Lab. By running MATCH (n) RETURN n; Cypher query, the nodes will be visualized just like in the picture below.
In a similar way, create relationship classes:
class FriendsWith(Relationship, type="FRIENDS_WITH"):
    last_chatted: str
The code above maps to a relationship of type FRIENDS_WITH, with the string property last_chatted.
For relationships without any properties, also use pass statement:
class FriendsWith(Relationship, type="FRIENDS_WITH"):
pass
To save and create relationships using the object graph mapper, create them with appropriate start and end nodes and then use the save() procedure:
FriendsWith(
    _start_node_id=John._id, _end_node_id=Anna._id
).save(memgraph)
Combining all of the code, creates the following script:
from gqlalchemy import Memgraph
from gqlalchemy import Memgraph, Node, Relationship
class Person(Node):
id: str
name: str
class FriendsWith(Relationship, type="FRIENDS_WITH"):
pass
def main():
memgraph = Memgraph("127.0.0.1", 7687)
Alex = Person(id="1", name="Alex").save(memgraph)
Anna = Person(id="2", name="Anna").save(memgraph)
John = Person(id="3", name="John").save(memgraph)
FriendsWith(
_start_node_id=John._id, _end_node_id=Anna._id).save(memgraph)
FriendsWith(
_start_node_id=John._id, _end_node_id=Alex._id).save(memgraph)
FriendsWith(
_start_node_id=Alex._id, _end_node_id=Anna._id).save(memgraph)
if __name__=="__main__":
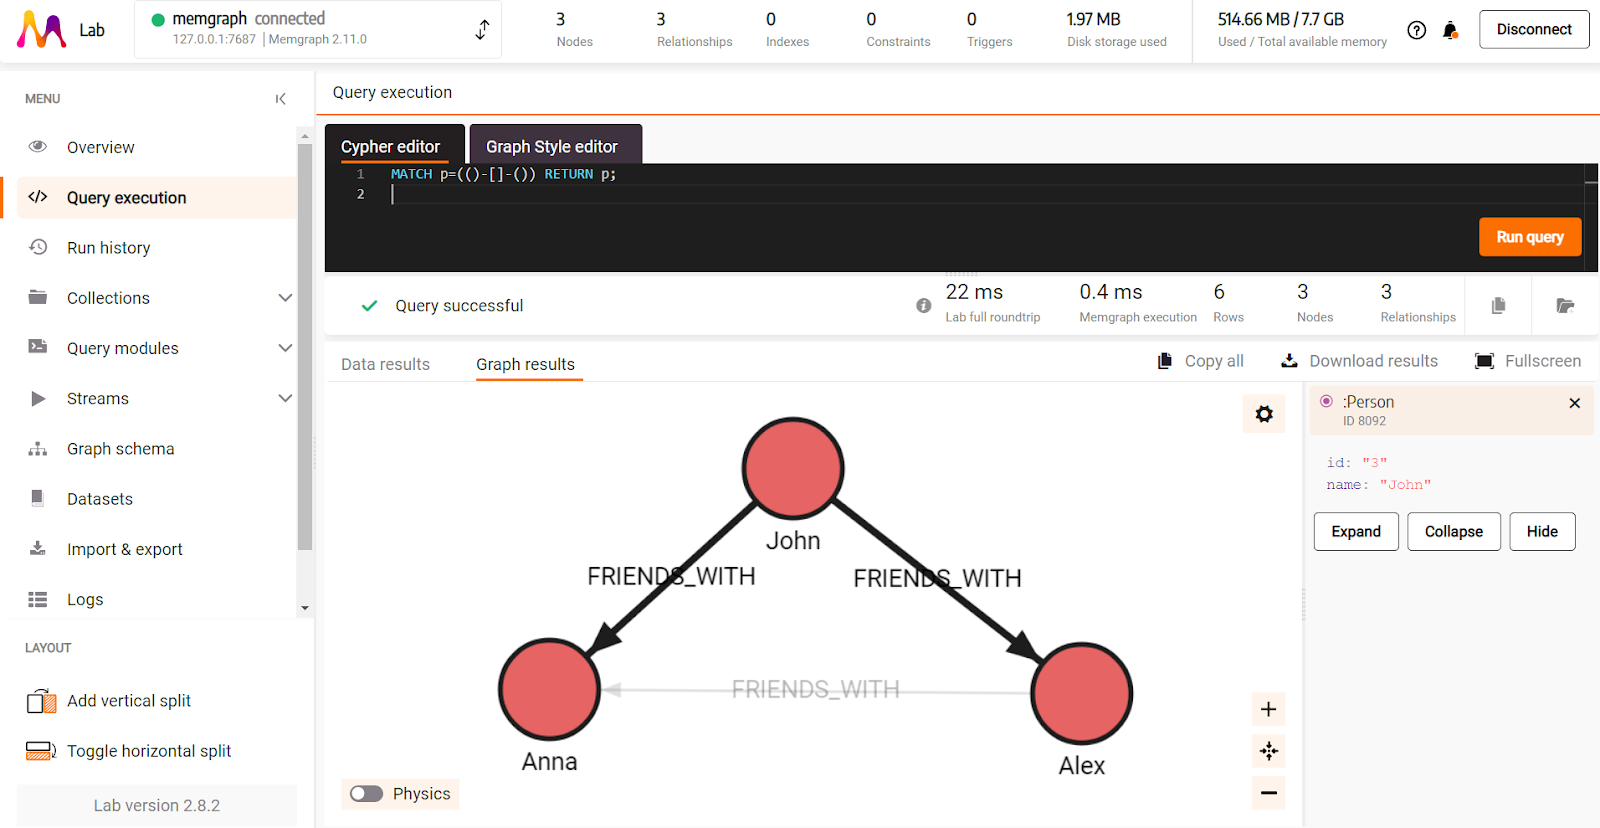
main()Let’s visualize the created nodes and relationships using Memgraph Lab. After running MATCH p=(()-[]-()) RETURN p; Cypher query, in the picture below we can nodes and relationships we created, along with the properties of one of them:
To create a new relationship of type FRIENDS_WITH between already saved nodes, you first need to load them:
loaded_node1 = Person(id="1").load(db=memgraph)
loaded_node2 = Person(id="2").load(db=memgraph)
The load() method in the example above will return one result, since it matches a unique database object. When the matching object is not unique, the load() method will return a list of matching results.
To create a relationship between loaded_node1 and loaded_node2 nodes, run:
FriendsWith(
 _start_node_id=loaded_node1._id, _end_node_id=loaded_node2._id).save(memgraph)
In the example above, the relationship will be created even if it existed before.
Takeaways
In conclusion, as the landscape of graph database technology continues to evolve, it's imperative for developers to adapt to the latest tools and libraries to ensure the efficiency of their projects. If you've been relying on py2neo as your go-to library, it's important to note that it's no longer actively maintained. However, the good news is that there's a powerful and versatile alternative in Memgraph's GQLAlchemy.
Whether you're a seasoned graph database developer or just beginning your graph journey, this transition equips you with the tools to work with Memgraph effectively. If there’s any questions left unanswered after this article, join us on Discord where we have a vibrant community always ready to help.