Exploring a Twitter Network With Memgraph in a Jupyter Notebook
Through this short tutorial, you will learn how to install Memgraph, connect to it from a Jupyter Notebook and perform data analysis using graph algorithms. You can find the original Jupyter Notebook in our open-source GitHub repository.
If at any point you experience problems with this tutorial or something is unclear to you, reach out on our Discord server. The dataset from this tutorial is also available in the form of a Playground sandbox which you can query from your browser.
1. Prerequisites
For this tutorial, you will need to install:
- Jupyter: Jupyter is necessary to run the notebook available here.
- Docker: Docker is used because Memgraph is a native Linux application and cannot be installed on Windows and macOS.
- GQLAlchemy: A Python OGM (Object Graph Mapper) that connects to Memgraph.
- Pandas: A popular data science library.
2. Installation using Docker
After you install Docker, you can set up Memgraph by running:
docker run -it -p 7687:7687 -p 3000:3000 memgraph/memgraph-platform
This command will start the download and after it finishes, run the Memgraph container.
3. Connecting to Memgraph with GQLAlchemy
We will be using the GQLAlchemy object graph mapper (OGM) to connect to Memgraph and execute Cypher queries easily. GQLAlchemy also serves as a Python driver/client for Memgraph. You can install it using:
pip install gqlalchemy
Hint: You may need to install CMake before installing GQLAlchemy.
Maybe you got confused when I mentioned Cypher. You can think of Cypher as SQL
for graph databases. It contains many of the same language constructs like
CREATE, UPDATE, DELETE... and it's used to query the database.
from gqlalchemy import Memgraph

memgraph = Memgraph("127.0.0.1", 7687)
Let's make sure that Memgraph is empty before we start with anything else.
memgraph.drop_database()Now let's see if the database is empty:
results = memgraph.execute_and_fetch(
    """
    MATCH (n) RETURN count(n) AS number_of_nodes ;
    """
)
print(next(results))
Output:
{'number_of_nodes': 0}
4. Define a graph schema
We are going to create Python classes that will represent our graph schema. This way, all the objects that are returned from Memgraph will be of the correct type if the class definition can be found.
from typing import Optional
from gqlalchemy import Field, Node, Relationship


class User(Node):
    username: str = Field(index=True, unique=True, db=memgraph)


class Retweeted(Relationship, type="RETWEETED"):
    pass
5. Creating and returning nodes
We are going to create User nodes, save them to the database and return them
to our program:
user1 = User(username="ivan_g_despot")
user2 = User(username="supe_katarina")

user1.save(memgraph)
user2.save(memgraph)

print(user1)
print(user2)
Output:
<User id=1874 labels={'User'} properties={'username': 'ivan_g_despot'}>
<User id=1875 labels={'User'} properties={'username': 'supe_katarina'}>
Now, let's try to create a node using the Cypher query language. We are going to
create a node with an existing username just to check if the existence
constraint on the property username is set correctly.
try:
    results = memgraph.execute(
        """
        CREATE (:User {username: "supe_katarina"});
        """
    )
except Exception:
    print("Error: A user with the username supe_katarina is already in the database.")
Output:
Error: A user with the username supe_katarina is already in the database.
6. Creating and returning relationships
We are going to create a Retweeted relationship, save it to the database and
return it to our program:
retweeted = Retweeted(_start_node_id=user1._id, _end_node_id=user2._id)

retweeted.save(memgraph)

print(retweeted)
Output:
<Retweeted id=1670 start_node_id=1874 end_node_id=1875 nodes=(1874, 1875) type=RETWEETED properties={}>
7. Importing data from CSV files
You will need to download this file which contains a simple dataset of
scraped tweets. To import it into Memgraph, we will first need to copy it to the
Docker container where Memgraph is running. Find the CONTAINER_ID by running:
docker ps
Copy the file with the following command (don't forget to replace
CONTAINER_ID):
docker cp scraped_tweets.csv CONTAINER_ID:scraped_tweets.csv
We are going to see what our CSV file looks like with the help of the pandas library. To install it, run:
pip install pandas
Now let's see what the CSV file looks like:
import pandas as pd

data = pd.read_csv("scraped_tweets.csv")
data.head()
Output:
| source_username | target_username | |
|---|---|---|
| 0 | CapeCodGiftShop | RetroCEO |
| 1 | CodeAttBot | LeeHillerLondon |
| 2 | BattlegroundHs | getwhalinvest |
| 3 | botpokemongofr1 | TrevorAllenPKMN |
| 4 | AnyaSha13331181 | WORLDMUSICAWARD |
Now, we can execute the Cypher command LOAD CSV, which is used for loading
data from CSV files:
memgraph.execute(
    """
    LOAD CSV FROM "/scraped_tweets.csv" WITH HEADER AS row
    MERGE (u1:User {username: row.source_username})
    MERGE (u2:User {username: row.target_username})
    MERGE (u1)-[:RETWEETED]->(u2);
    """
)
You can think of the LOAD CSV clause as a loop that will go over every row in
the CSV file and execute the specified Cypher commands.
8. Querying the database and retrieving results
Let's make sure that our data was imported correctly by retrieving it:
results = memgraph.execute_and_fetch(
    """
    MATCH (u:User)
    RETURN u
    ORDER BY u.username DESC
    LIMIT 10;
    """
)

results = list(results)

for result in results:
    print(result["u"])
Output:
<User id=3692 labels={'User'} properties={'username': 'zziru67'}>
<User id=3240 labels={'User'} properties={'username': 'zippydjh'}>
<User id=3725 labels={'User'} properties={'username': 'zee_row_ex'}>
<User id=3591 labels={'User'} properties={'username': 'yvonneqqm'}>
<User id=3212 labels={'User'} properties={'username': 'yujulia999'}>
<User id=2378 labels={'User'} properties={'username': 'yudhapati88'}>
<User id=2655 labels={'User'} properties={'username': 'yu100_kun'}>
<User id=2302 labels={'User'} properties={'username': 'youth_tree'}>
<User id=2432 labels={'User'} properties={'username': 'yourkpopsoul'}>
<User id=2132 labels={'User'} properties={'username': 'your_harrogate'}>
We can also check the type of the retrieved records:
u = results[0]["u"]

print("User: ", u.username)
print("Type: ", type(u))
Output:
User:  zziru67
Type:  <class '__main__.User'>
Let's try to execute the same query with the GQLAlchemy query builder:
from gqlalchemy import match

results_from_qb = (
    match()
    .node(labels="User", variable="u")
    .return_()
    .order_by("u.username DESC")
    .limit(10)
    .execute()
)
results_from_qb = list(results_from_qb)

for result in results_from_qb:
    print(result["u"])
Output:
<User id=3692 labels={'User'} properties={'username': 'zziru67'}>
<User id=3240 labels={'User'} properties={'username': 'zippydjh'}>
<User id=3725 labels={'User'} properties={'username': 'zee_row_ex'}>
<User id=3591 labels={'User'} properties={'username': 'yvonneqqm'}>
<User id=3212 labels={'User'} properties={'username': 'yujulia999'}>
<User id=2378 labels={'User'} properties={'username': 'yudhapati88'}>
<User id=2655 labels={'User'} properties={'username': 'yu100_kun'}>
<User id=2302 labels={'User'} properties={'username': 'youth_tree'}>
<User id=2432 labels={'User'} properties={'username': 'yourkpopsoul'}>
<User id=2132 labels={'User'} properties={'username': 'your_harrogate'}>
9. Calculating PageRank
Now, let's do something clever with our graph. For example, calculating PageRank
for each node and then adding a rank property that stores the PageRank value
to each node:
results = memgraph.execute_and_fetch(
    """
    CALL pagerank.get()
    YIELD node, rank
    SET node.rank = rank
    RETURN node, rank
    ORDER BY rank DESC
    LIMIT 10;
    """
)

for result in results:
    print("The PageRank of node ", result["node"].username, ": ", result["rank"])
Output:
The PageRank of node  WORLDMUSICAWARD :  0.13278838151391434
The PageRank of node  Kidzcoolit :  0.018924764871246207
The PageRank of node  HuobiGlobal :  0.011314994833838172
The PageRank of node  ChloeLe39602964 :  0.010011755296388128
The PageRank of node  getwhalinvest :  0.007228675936490175
The PageRank of node  Cooper_Lechat :  0.005577971882231625
The PageRank of node  Phemex_official :  0.005413803151353543
The PageRank of node  HamleysOfficial :  0.005325936307836382
The PageRank of node  bmstores :  0.00524546649693655
The PageRank of node  TheStourbridge :  0.004422198431576731
Visit the Memgraph MAGE graph library (and throw us a star ⭐) and take a look at all of the graph algorithms that have been implemented. You can also implement and submit your own algorithms and utility procedures.
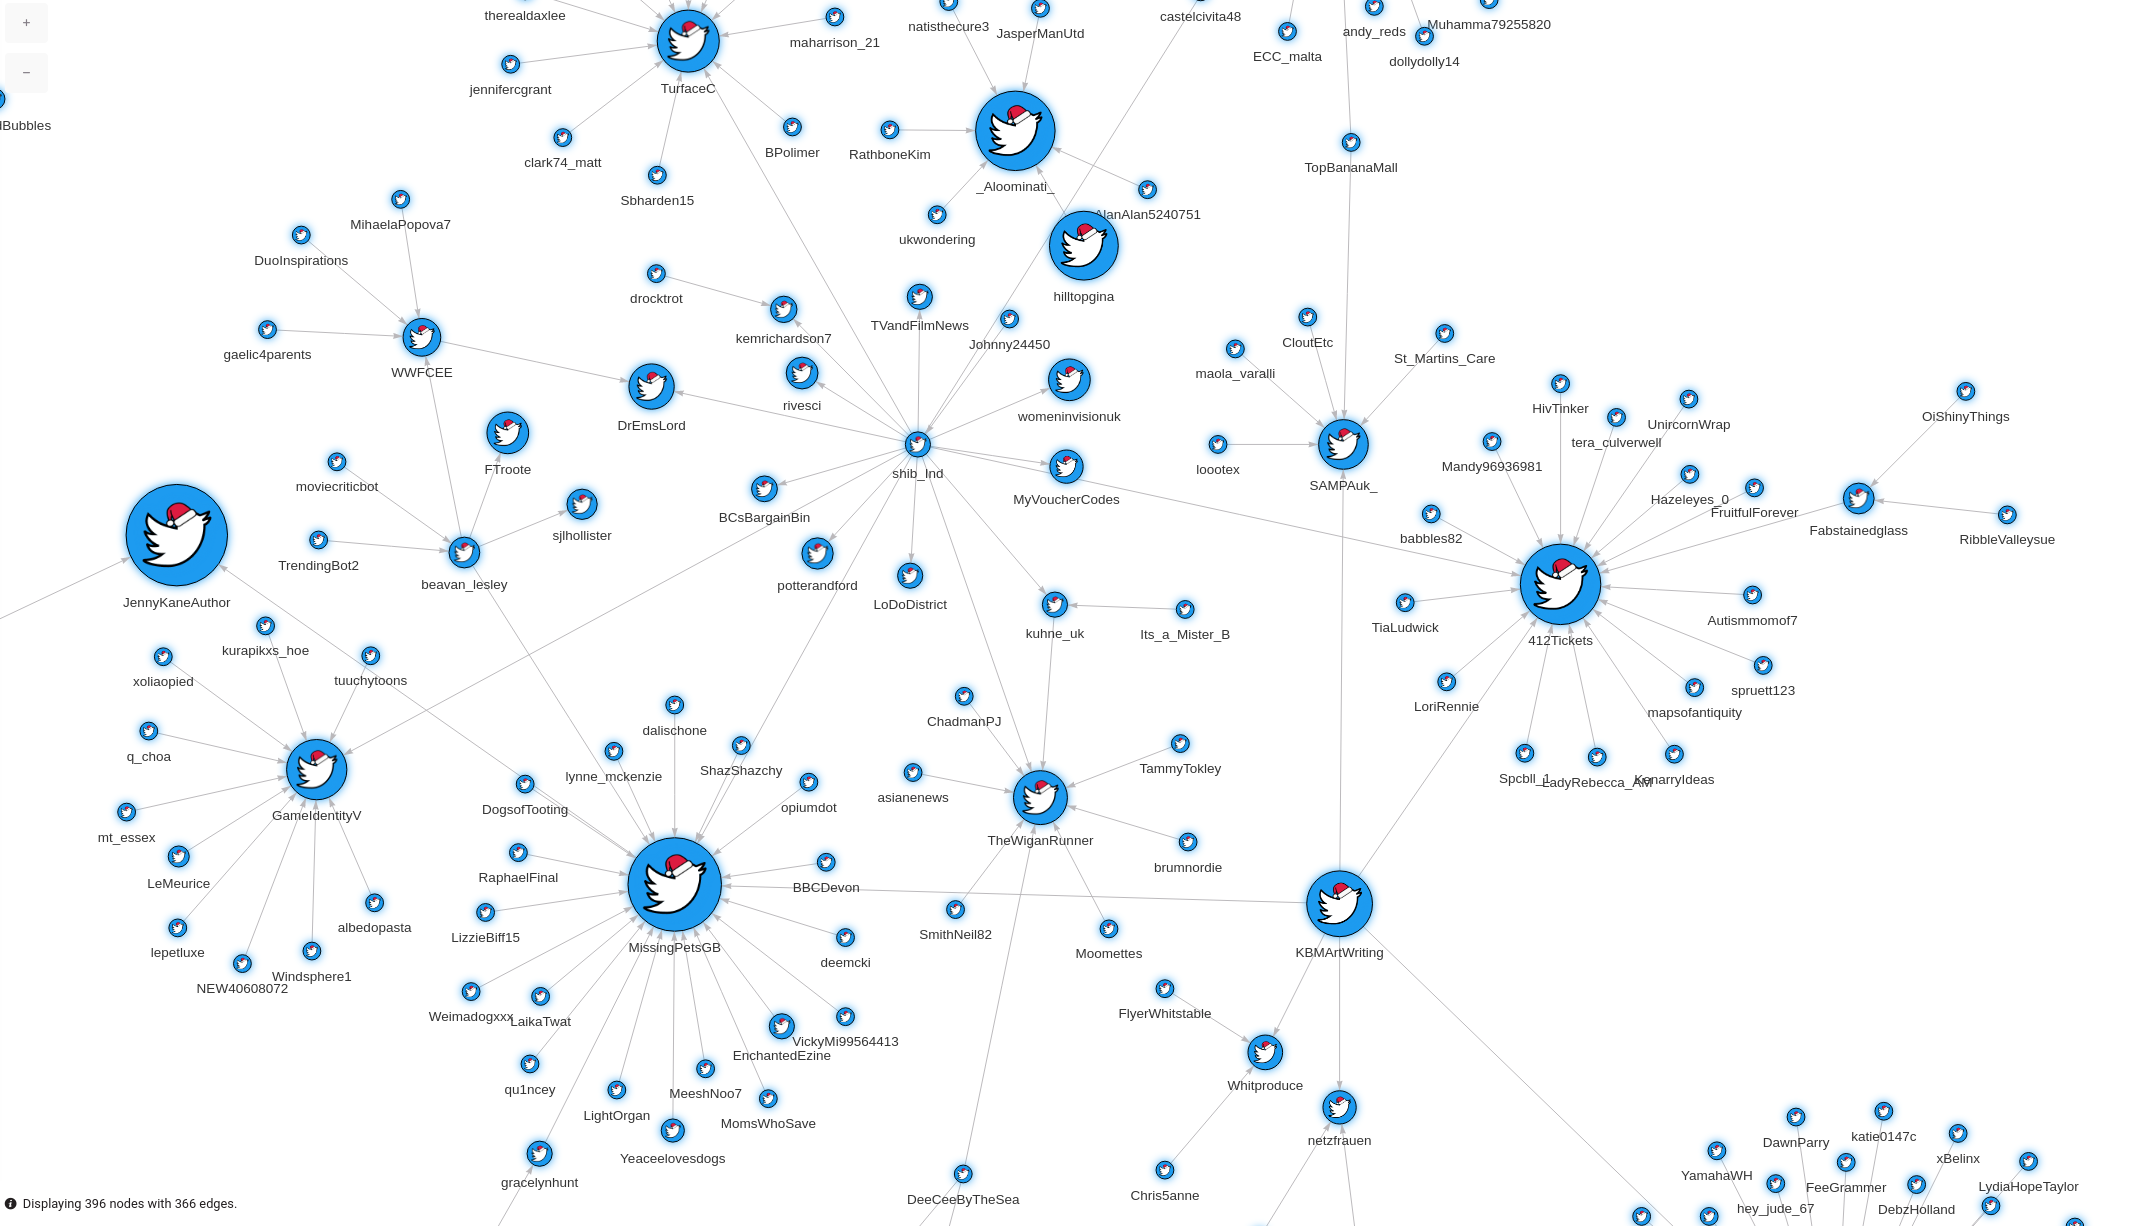
10. Visualizing the graph in Memgraph Lab
Open Memgraph Lab in your browser on the address localhost:3000. Execute the following Cypher query:
MATCH (n)-[r]-(m)
RETURN n, r, m
LIMIT 100;
Now apply the following graph style to make your graph look more descriptive:
@NodeStyle {
  size: Sqrt(Mul(Div(Property(node, "rank"), 1), 200000))
  border-width: 1
  border-color: #000000
  shadow-color: #1D9BF0
  shadow-size: 10
  image-url: "https://i.imgur.com/UV7Nl0i.png"
}

@NodeStyle Greater(Size(Labels(node)), 0) {
  label: Format(":{}", Join(Labels(node), " :"))
}

@NodeStyle HasLabel(node, "User") {
  color: #1D9BF0
  color-hover: Darker(#dd2222)
  color-selected: #dd2222
}

@NodeStyle HasProperty(node, "username") {
  label: AsText(Property(node, "username"))
}

@EdgeStyle {
  width: 1
}

What's next?
Now it's time for you to use Memgraph on a graph problem!
You can always check out Memgraph Playground for some cool use cases and examples. If you have any questions, or want to share your work with the rest of the community, join our Discord Server.