How to Install Memgraph and Memgraph Lab on Windows 10
Introduction
In this tutorial, you will install both Memgraph and Memgraph Lab on your Windows 10 PC. You will then test each installation by running a few basic queries to make sure that everything is working correctly.
Memgraph is a native, in-memory graph database built for real-time business-critical applications. Memgraph supports strongly-consistent ACID transactions; and uses the Cypher query language for structuring, manipulating, and exploring data.
Memgraph Lab is a lightweight and intuitive Cypher and Bolt compatible integrated development environment (IDE). It's designed to help you import data, develop, debug, and profile database queries and visualize query results.
Prerequisites
For a seamless installation of Memgraph and Memgraph Lab on your Windows PC, ensure that you have:
- A computer running Windows 10 (64-bit version) with Fall Creators Update.
- Administrative rights to your Windows PC and an internet connection.
- Basic knowledge of working with the command line.
Step 1 — Enable Windows Subsystem for Linux
The Windows subsystem for Linux became a stable feature in Fall Creators Update of Windows 10. You can now run Ubuntu, Debian or Kali right from your Windows machine. It is only available for 64 bit Windows so make sure you are running the 64-bit version of Windows. You can determine whether your computer is running a 32-bit version or 64-bit version of the Windows operating system by following this guide.
Once you have made sure you are running the 64-bit version of Windows, you need to enable the Windows subsystem for Linux. To do this, you can follow these instructions. Please make sure to install the Debian distribution of Linux from the Windows App store.
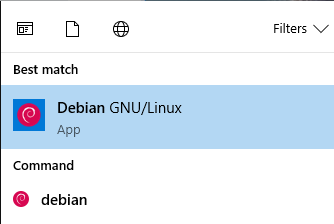
Once your installation is complete, you can test it by clicking on the start button on the bottom left side of your Windows screen, searching for Debian and launching the app.
The first time you launch the app, you will be asked to enter your username and password. If everything works properly, you will get the following output:
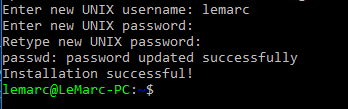
Congratulations! You have successfully installed the Debian distribution of Linux on your Windows machine. You are now ready to install Memgraph.
Step 2 — Installing Memgraph
To get started, go to Memgraph's downolad page and download the latest Debian installation package.
Once the download is complete, open your Debian shell and run the following command to start the installation process:
dpkg -i /path/to/memgraph_<version>.deb
- replace
/path/towith path where you downloaded your installation package. - replace
_versionwith the version of the package that you are installing(usually the name of the installation package you downloaded).
For example, if you downloaded version 1.0.0-1_amd64 to your D: Directory than this command will be changed to:
dpkg -i /mnt/d/memgraph_1.0.0-1_amd64.deb
Note: If you see any error related to missing dependency packages, you might have to run the following commands before installing Memgraph:
sudo apt-get update
sudo apt-get -f install
Normally, you would start Memgraph using systemd, but unfortunately, this is not an option in WSL.
We can bypass this inconvenience by using the command runuser which allows us to run commands with a substitute user and group ID.
Start the Memgraph server by issuing the following command:
sudo runuser -l memgraph -c '/usr/lib/memgraph/memgraph'
If Memgraph has been installed correctly you will see something like this:
You are running Memgraph v1.3.0-community
Awesome! You now have a running instance of Memgraph on your Windows machine. In the next step, you will learn how to query Memgraph from the command line interface (CLI).
Step 3 — Querying Memgraph through the CLI tool with mgconsole.
Memgraph comes with a tool called mgconsole which allows you to execute queries against the Memgraph server from your command-line interface.
To install mgconsole, you can refer to the mgconcole installation guide
Once you have mgconsole successfully installed, you are now ready to query Memgraph. To make sure that everything works, we will execute two basic queries that demonstrate the creation and retrieval of data from the database.
Memgraph supports the Cypher query through the openCypher project. Cypher is a SQL-like declarative query language purposely designed to efficiently query and update property graphs.
Let's begin by executing a first query to create a small dataset:
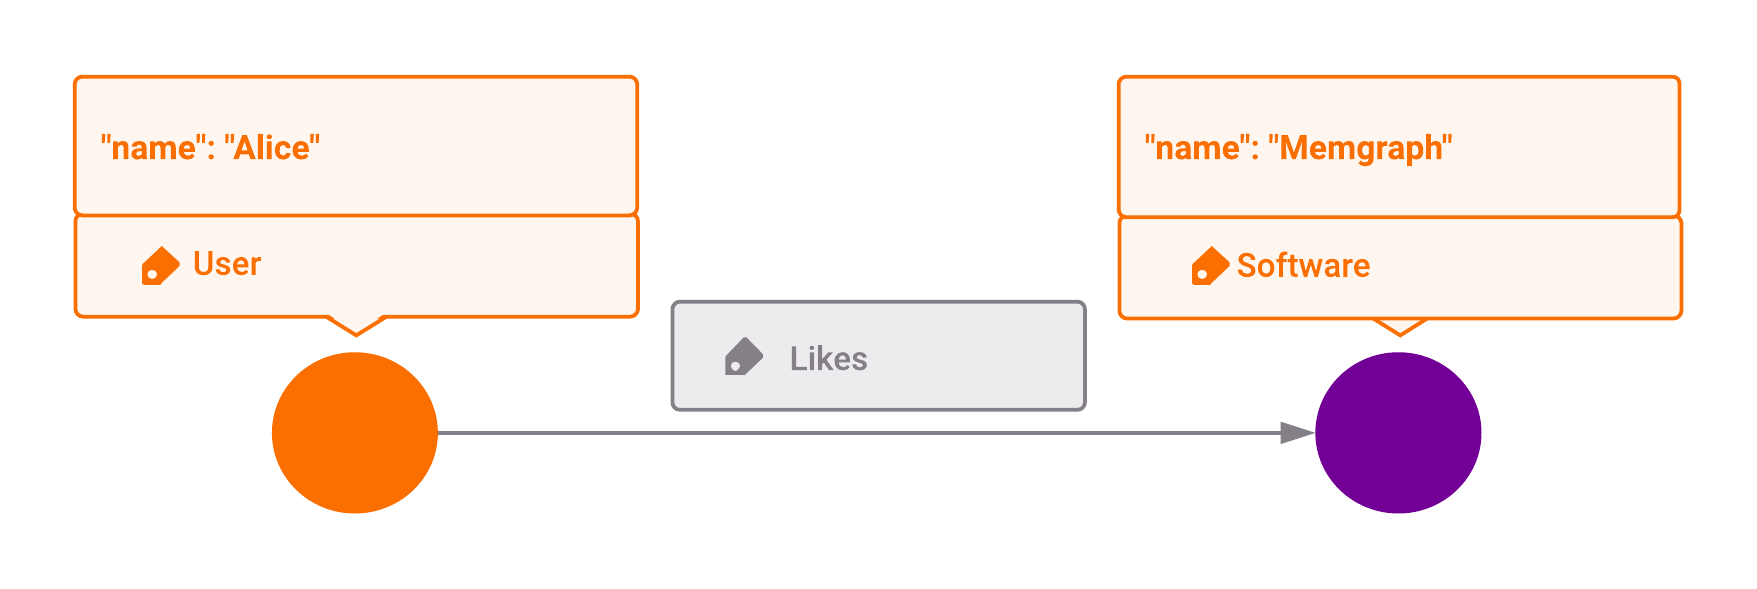
CREATE (u:User {name: "Alice"})-[:Likes]->(m:Software {name: "Memgraph"});
The above will create 2 nodes in the database, one labeled "User" with the name "Alice" and the other labeled "Software" with the name "Memgraph". It will also create a relationship that "Alice" likes "Memgraph".
Note: Each query needs to end with the ; (semicolon) character.
Next, we will retrieve the created nodes and relationships by executing this second query:
MATCH (u:User)-[r]->(x) RETURN u, r, x;
The query should return the following result:
| u                           | r        | x                                 |
| ----------------------------| -------- | ----------------------------------|
| (:User {name: "Alice"})     | [Likes]  | (:Software {name: "Memgraph"})    |
Excellent! You have now installed Memgraph and used its CLI tool to run a few simple queries.
Now, aside from a CLI tool, Memgraph also has an integrated development environment called Memgraph Lab to help you manage and execute various tasks on your databases. Let's move on to the next step to install it.
Step 4 — Installing Memgraph Lab and Connecting to Memgraph
Start by downloading Memgraph Lab for Windows.
The downloaded package will be a .exe installer and can be easily installed just like other Windows installers.
Double click on the installer to start the installation process. Depending on your Windows security preferences, Windows Defender SmartScreen might block the installer from running the first time. This is because it can’t recognize the developer of the app, which in this case, is Memgraph. This is normal and nothing you should worry about. Simply click on More Info and then click on Run Anyway.
Once the installation is completed, Memgraph Lab will launch, and you will be presented with the Home screen. Using the default values of the "Host" and "Port" text fields and leaving the "Username" and "Password" fields blank click "Connect" to start connecting to the Memgraph server.
Note: Before connecting, ensure that the Memgraph server is running as explained on Step 2. You won't be able to connect if the server is not running in the first place!
Once connected, you'll be presented with Memgraph Lab's user interface.
Now that we have Memgraph Lab installed and connected to Memgraph, we will run a few basic queries to make sure everything works properly.
Step 5 — Testing the Memgraph Lab Installation
Let's test Memgraph Lab by running the same queries we ran in Step 2.
-
First, click the "Query" tab on the left sidebar.
-
Next, enter this first query at the query editor which is located at the top of the screen:
CREATE (u:User {name: "Alice"})-[:Likes]->(m:Software {name: "Memgraph"});The query above creates 2 nodes and a relationship between them.
-
Lastly, click "Run" or press
Ctrl + Enterto execute the query.
If no error message appeared, that means your query executed successfully. Again, this is the same query we ran in Step 2. Kindly refer back to it for its explanation.
We will now retrieve the nodes and relationships we've just created by executing the following Cypher query:
MATCH (u:User)-[r]->(x) RETURN u, r, x;
You should get a result that looks similar to this in the graph tab:
You now have Memgraph Lab working correctly on your system. Memgraph Lab's visual presentation of query results is one of its best features. It helps you understand the relationships of your nodes compared to the tabular format presented by the mgconsole tool we introduced in Step 3. This makes Memgraph Lab the preferred tool for both beginners learning Memgraph and the Cypher query language, and advanced Memgraph users working on complex queries.
Conclusion
In this tutorial, you installed Memgraph and Memgraph Lab on Windows 10 using Windows Subsystem for Linux. You tested the Memgraph installation by running a Memgraph server and using the mgconsole CLI tool to execute Cypher queries. The same goes for Memgraph Lab, but instead of using the CLI tool, you ran the queries inside the application.
If you are interested in learning more about each product, please consult the respective Memgraph and Memgraph Lab.
If you are new to Memgraph or graph databases in general, finishing this tutorial marks an excellent starting point for further learning and something you should build upon. Here are our other tutorials you can follow:
- How to build an air traffic routing application with Memgraph.
- Analyzing TED talks with Memgraph and Cypher
If you have any questions or would like to get any help with Memgraph, please check out our Discord server.